
Create a FlipGrid Account
- Go to https://info.flipgrid.com/
- Click Sign up Today! and then click Sign up with Google.
- Select your @myci.csuci.edu account by clicking that account.
- If your @myci.csuci.edu account is not listed, click Use another account and follow the instructions to add your CSUCI-affiliated account.
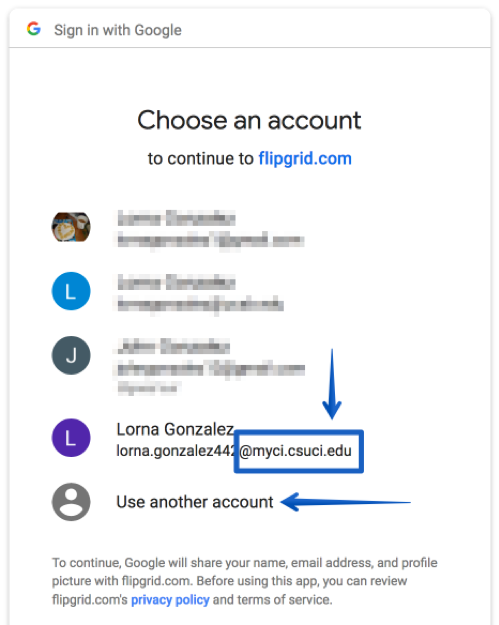
- If your @myci.csuci.edu account is not listed, click Use another account and follow the instructions to add your CSUCI-affiliated account.
- Complete the questionnaire to get started and then click Let’s Go!
Now you have a FlipGrid account and will be directed to the FlipGrid launch pad.
Set Up Your Canvas Integration
- Log in to your FlipGgrid account.
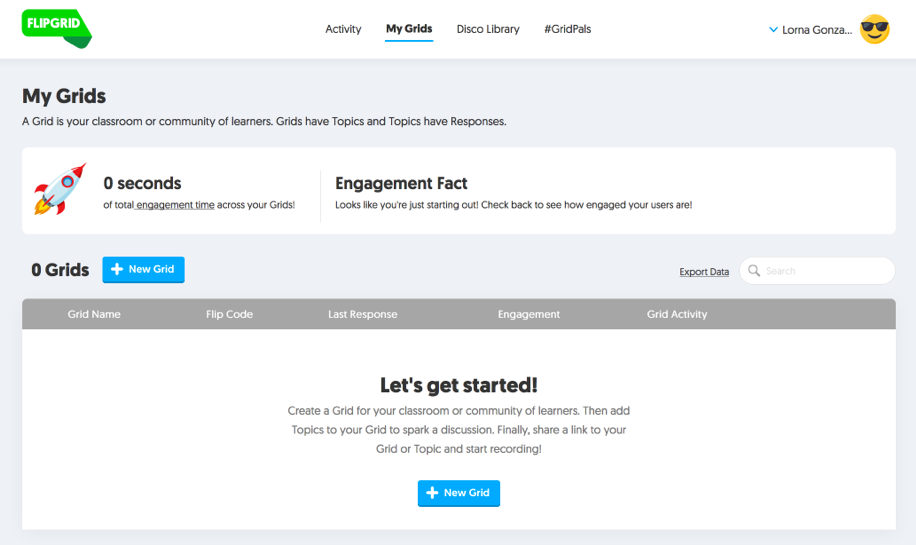
- On your dashboard, click your name, and then click integrations.
- Click New Integration.
- Give your integration a name (this could be the name of your course, like EDSS 540).
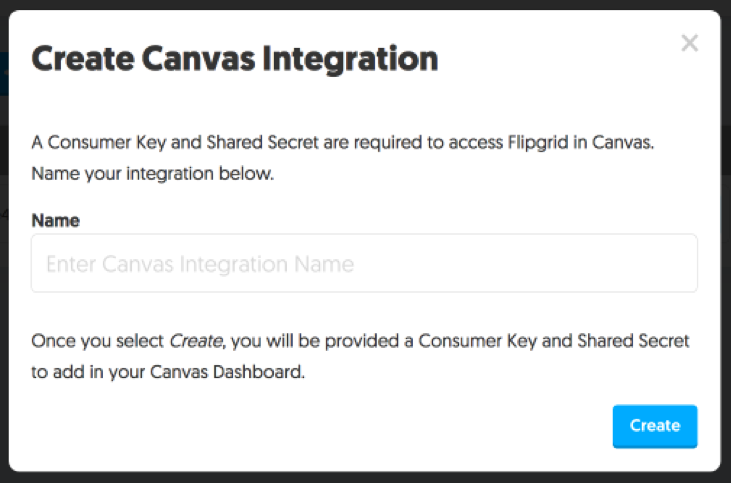
- Click Create. This will generate a Consumer Key and Shared Secret.
- Keep this page open and then open a new tab in your browser. Follow the directions below to add the FlipGrid integration to your Canvas Course.

Add FlipGrid to your Canvas Course
- Log in to myci.csuci.edu
- Click CI Learn and then click to enter your course.
- Scroll down and click Settings.
- Click Apps.
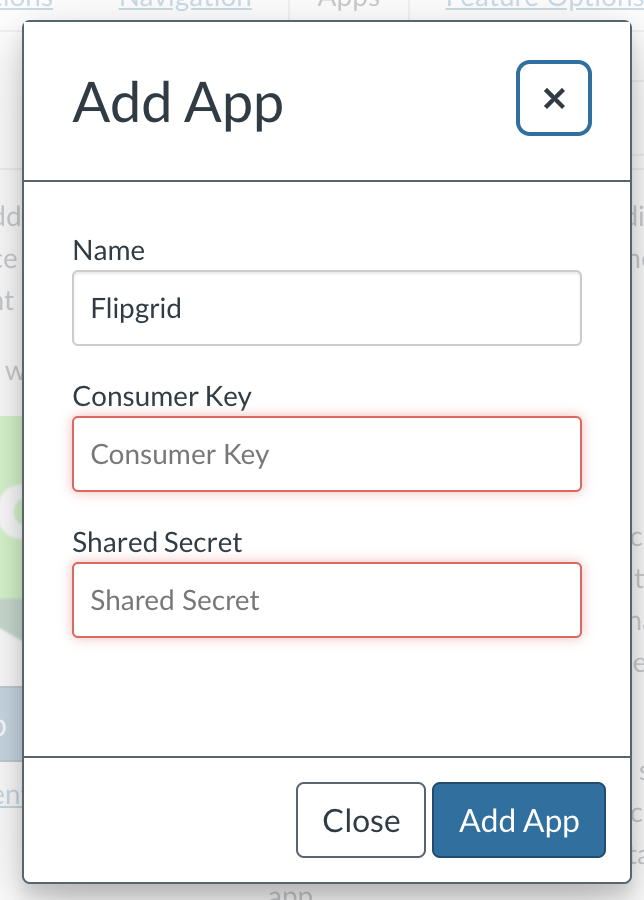
- Click FlipGrid and then click Add app.
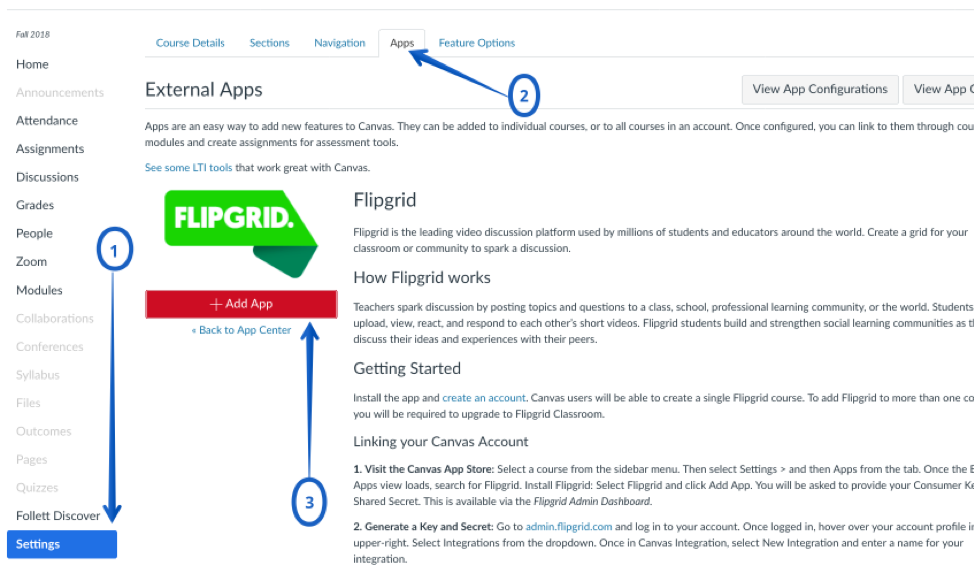
- Paste the information from your FlipGrid Integrations page into the Consumer Key and Shared Secret text fields.
- On your FlipGrid Integrations page, click Copy, next to your Consumer Key.
- On your Canvas External Apps page, click [command] v to paste the Consumer Key into the text field for that entry.
- Follow this same process for the Shared Secret.
- Click Add App.
Now you will see Flipgrid above Course Settings in your Course Menu on the left side of your Canvas page! If you do not, you may need to enable it.
- Go to Settings
- Select the Navigation Tab
- Drag Flipgrid from the list of Hidden Items to the list of Items that appear in the course Navigation
- Select Save
- Refresh your course page
Add a Flipgrid Assignment to your Course
Even though you will now have a Flipgrid button on your course menu bar, to create a Flipgrid assignment, you must use the Assignments tool in Canvas.
- Log in to myci.csuci.edu
- Click CI Learn and click to enter your course site.
- Click Assignments.
- Click the +Assignment button.
- Give the assignment a name and insert instructions into the text field.
- Scroll down to Submission Type, and select External Tool from the drop-down menu.
- In the Enter or Find an External Tool URL field, click Find.
- Scroll down and click Flipgrid and then click Select.
- Adjust other assignment settings, like Points, Assignment Group, and Display Grade as…, as needed.
- Click Save.
Now, you will see the assignment with an embedded Flipgrid page, but you still need to edit the Flipgrid initial/instructor post. - Click the pencil icon to edit your Flipgrid assignment.
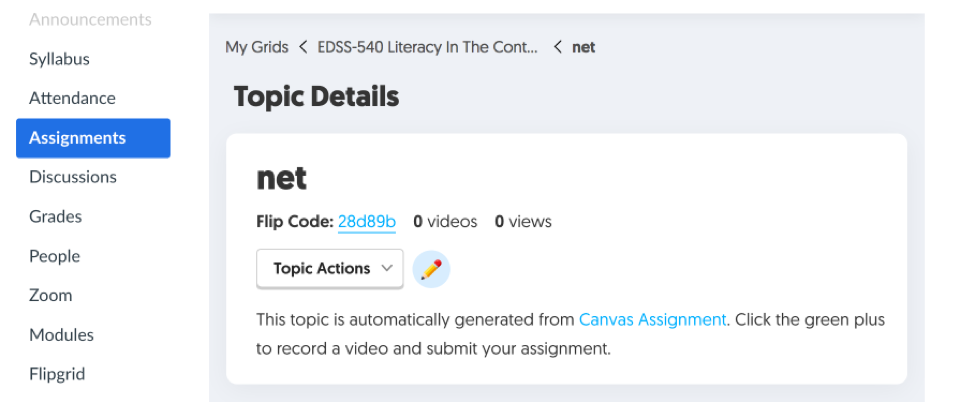
- Edit the options, as needed. You can adjust the allotted time for video responses (default is 1 minute 30 seconds), re-paste your initial topic/instructions for posting (highly recommended), add a resource (like a quick video prompt, attachment, etc.), and set your discussion preferences.
- Click Update Topic to save your changes.
