Beginning a New Adobe Spark Video Project
To begin creating with adobe spark, head over to spark.adobe.com and either create or log-into an existing account. CSUCI faculty, students and staff can use their school enterprise accounts to sign into Adobe Spark to gain access to their provided Premium accounts. Once you have logged in, you will be taken to your account homepage.
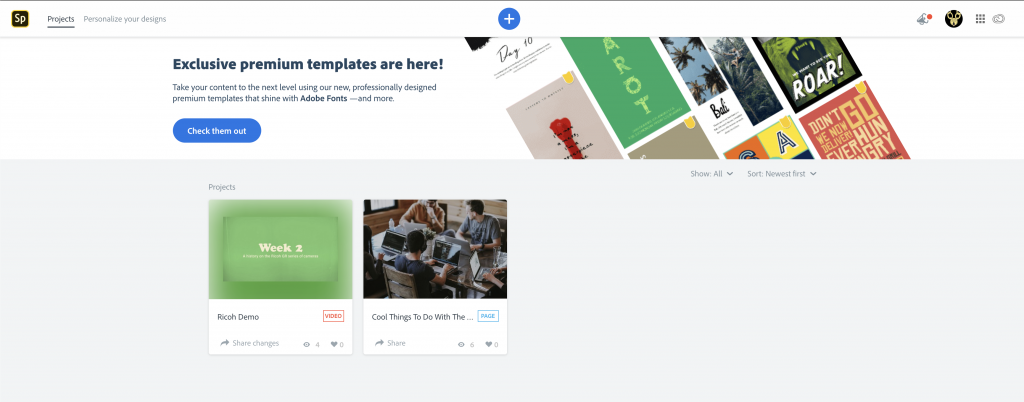

To create a new project, click on the “+” button at the top center of the page, this will take you to the Spark Templates page.
On the Spark Templates page, you will see that templates for projects are broken out into project types tabs; “All”, “Graphics”, “Web Pages” and “Videos”. Navigate to the “Videos” tab at the top center of the screen if you wish to use a pre-made template for your video project. If you wish to start with a blank project, navigate to the “Start from scratch” button on the top left hand side of the page and choose “Video” from the dropdown menu.

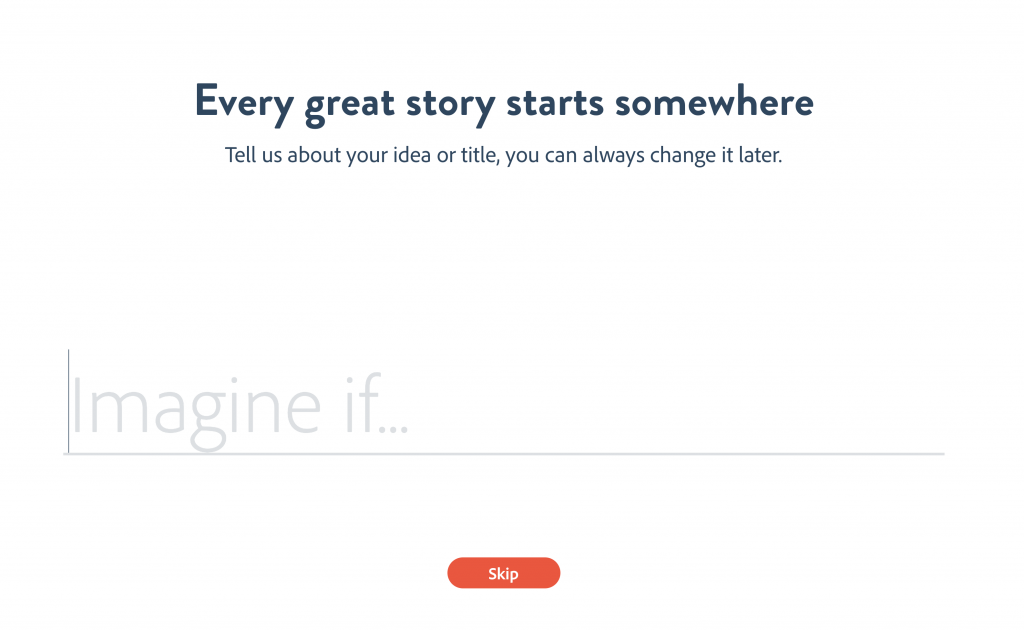
This will open up the Project Title page. This page is merely a prompt to give your project a title before you begin, if you don’t have a project name in mind, you can press the “Skip” button at the bottom of the page to name the project later. Any unnamed project will be automatically named as “My Video” .
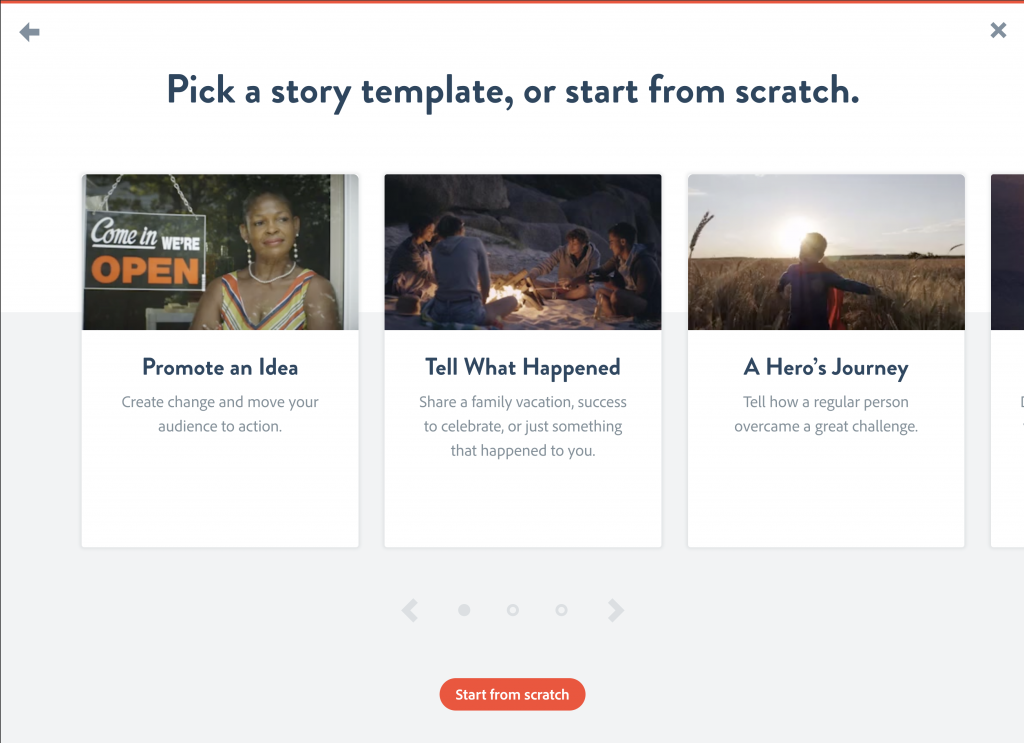
Regardless of if you have chosen to start a project with or without a template, you will be prompted to choose a story template if desired, which will lay out pre-made slides to help you narratively structure the video you are trying to make. If you wish to start with no pre-made slides, click on the “Start from scratch” button at the bottom of the page.
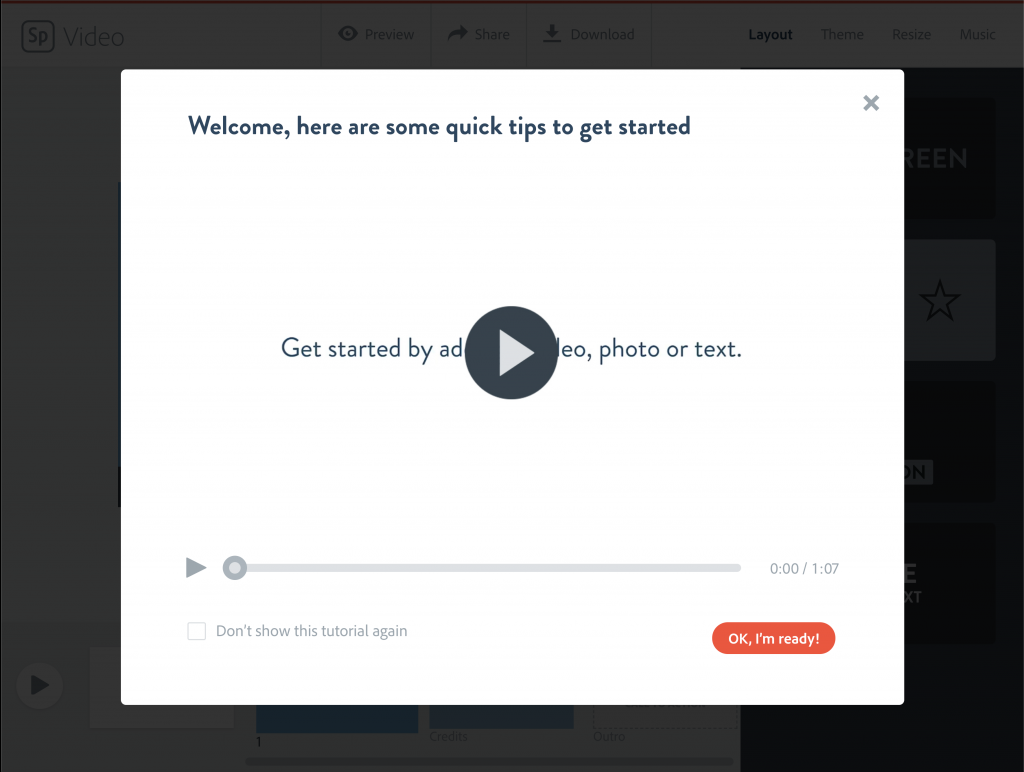
This will finally take you to the Video Editor page for Spark Video. If you have never created a Spark Video before, you will be prompted with a pop-up to watch a short video on how to use Spark Video. When you are ready to begin your project, you can check the “Don’t show this tutorial again” at the bottom left hand of the pop-up window if you do not want it to pop up next time you create a video, and then press the “OK, I’m ready!” button at the bottom right corner of the pop up window to enter the editor.
Using the Spark Video Editor
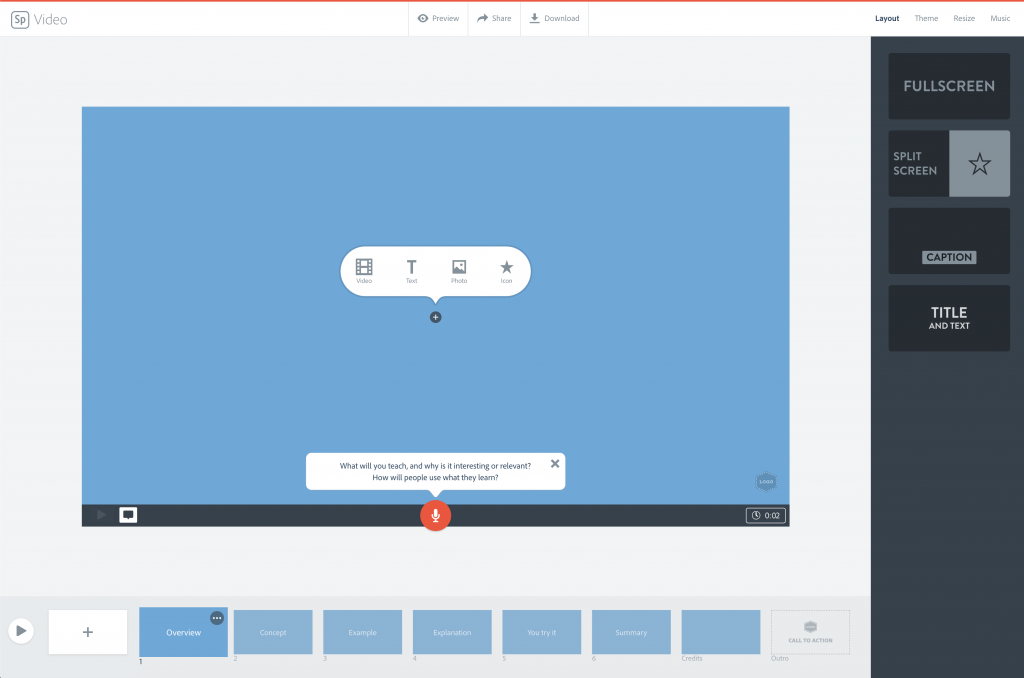
The Spark Video Editor is how you will record and assemble your video. Let’s take a look at the individual components of the Spark Video editor to better understand the process of video creation with this app.
Slides & The Video Timeline
Adobe Spark videos are made by assembling slides in a timeline that will determine the order they are presented in, just like you would with static images and text with PowerPoint and Google Slides. Adobe Spark slides are pre-programmed with animations and transitions, the only thing you need to do is to add content to each slide and then Adobe Spark will turn it into a full video upon export. At the bottom of the screen, you will see the Video Timeline were you can add, delete, and re-order as many slides as you want to create your video project. You can also choose which slide you want to work on in the main Canvas area by clicking on it in the Video Timeline.
By default, a video started with a story template will have template slides already in place, if a video was started without a story template, you will be presented with just one slide.

Adding A Slide
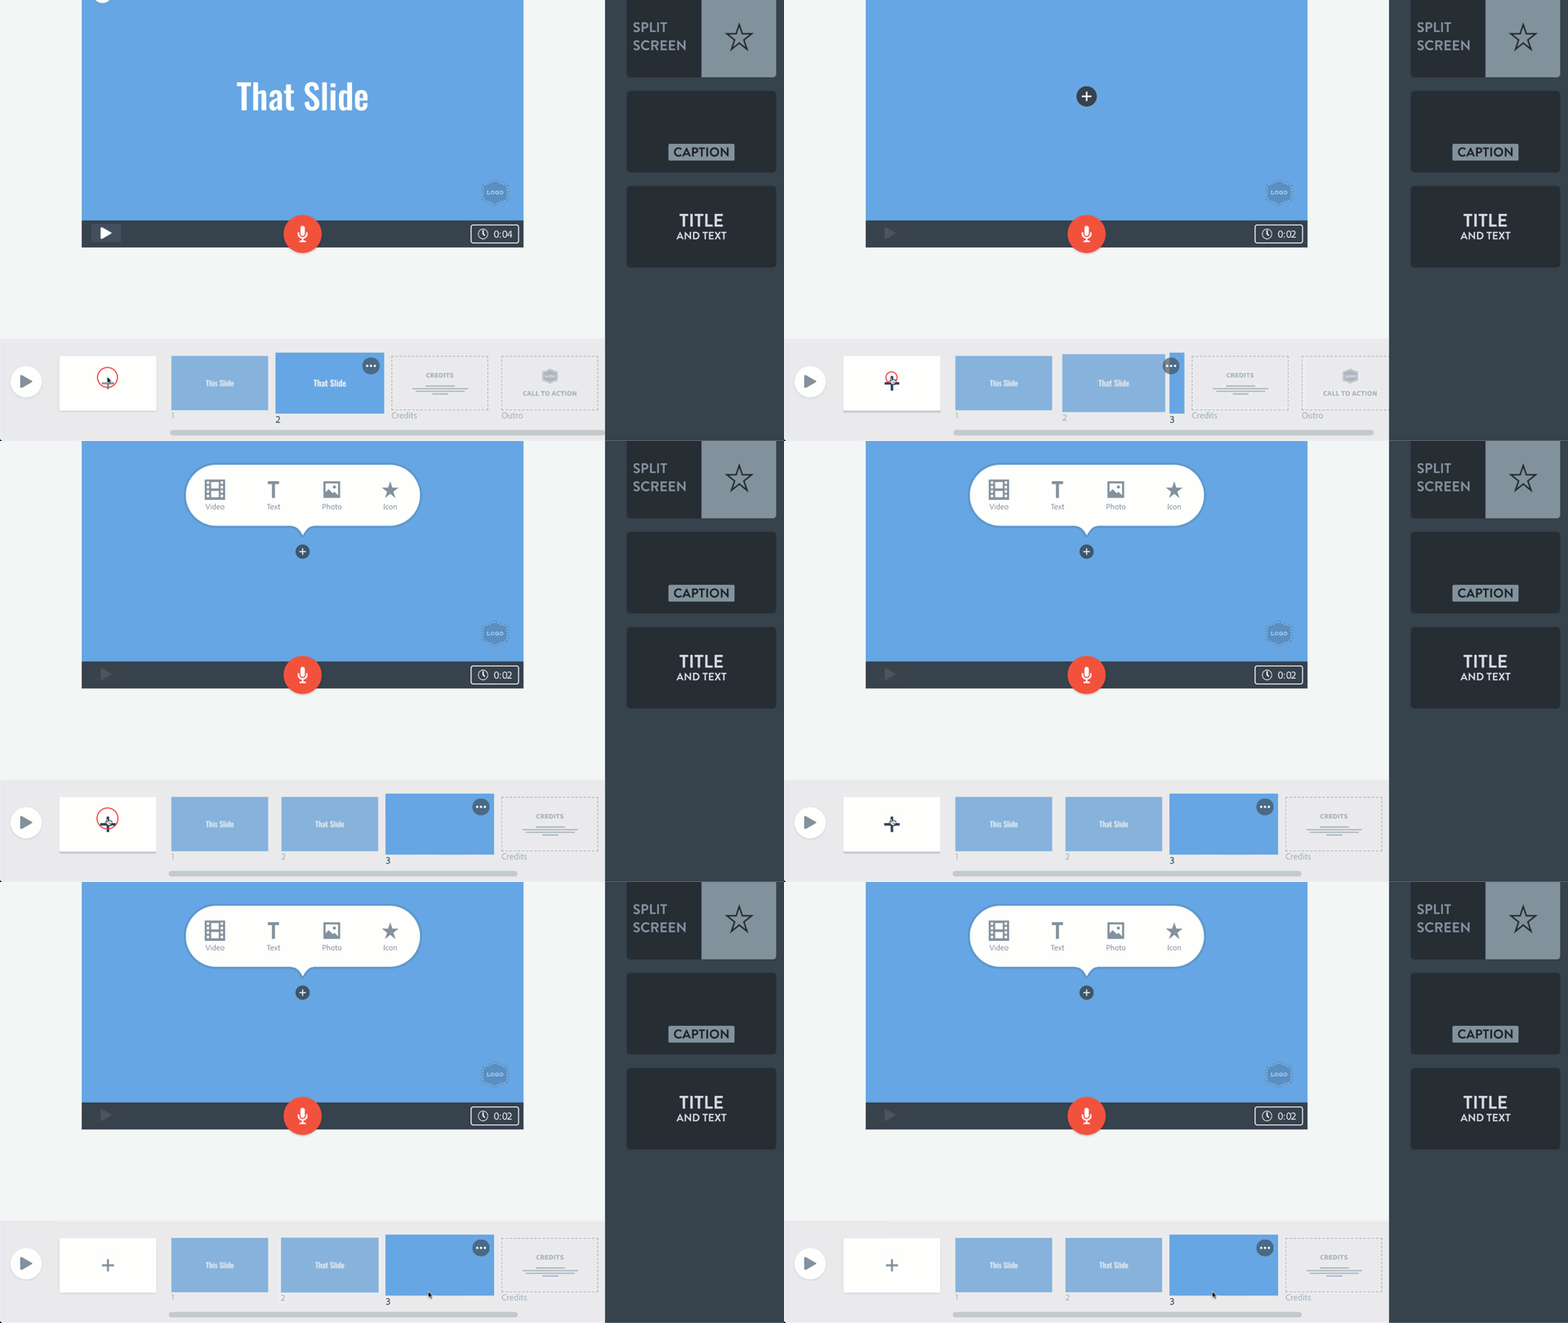
To add a new slide to your project, click on the “+” slide button on the far left hand side of the Video Timeline. The new slide will appear in the last position in your Video Timeline.
Rearranging Slides
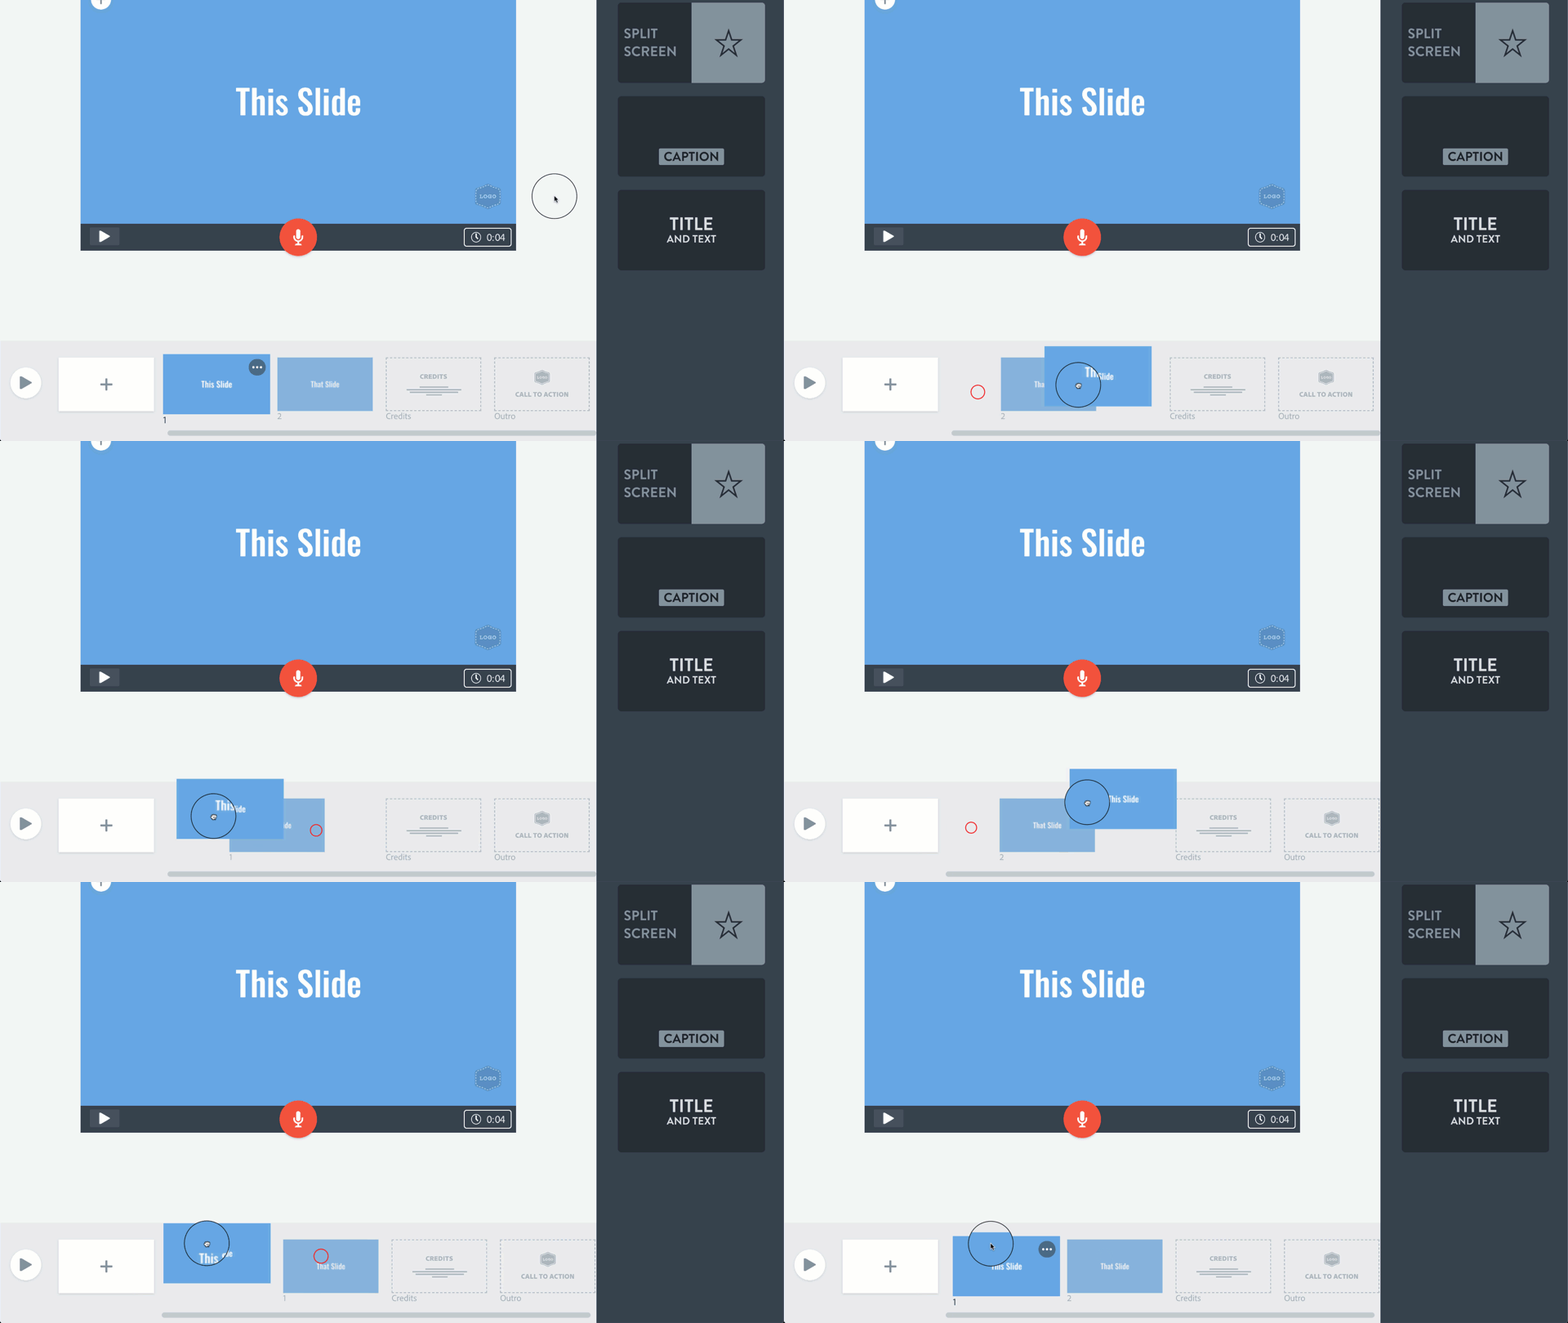
To rearrange your slide in the Video Timeline click and hold on the slide you wish to move with your mouse and drag it to the desired position on the timeline.
Deleting Slides
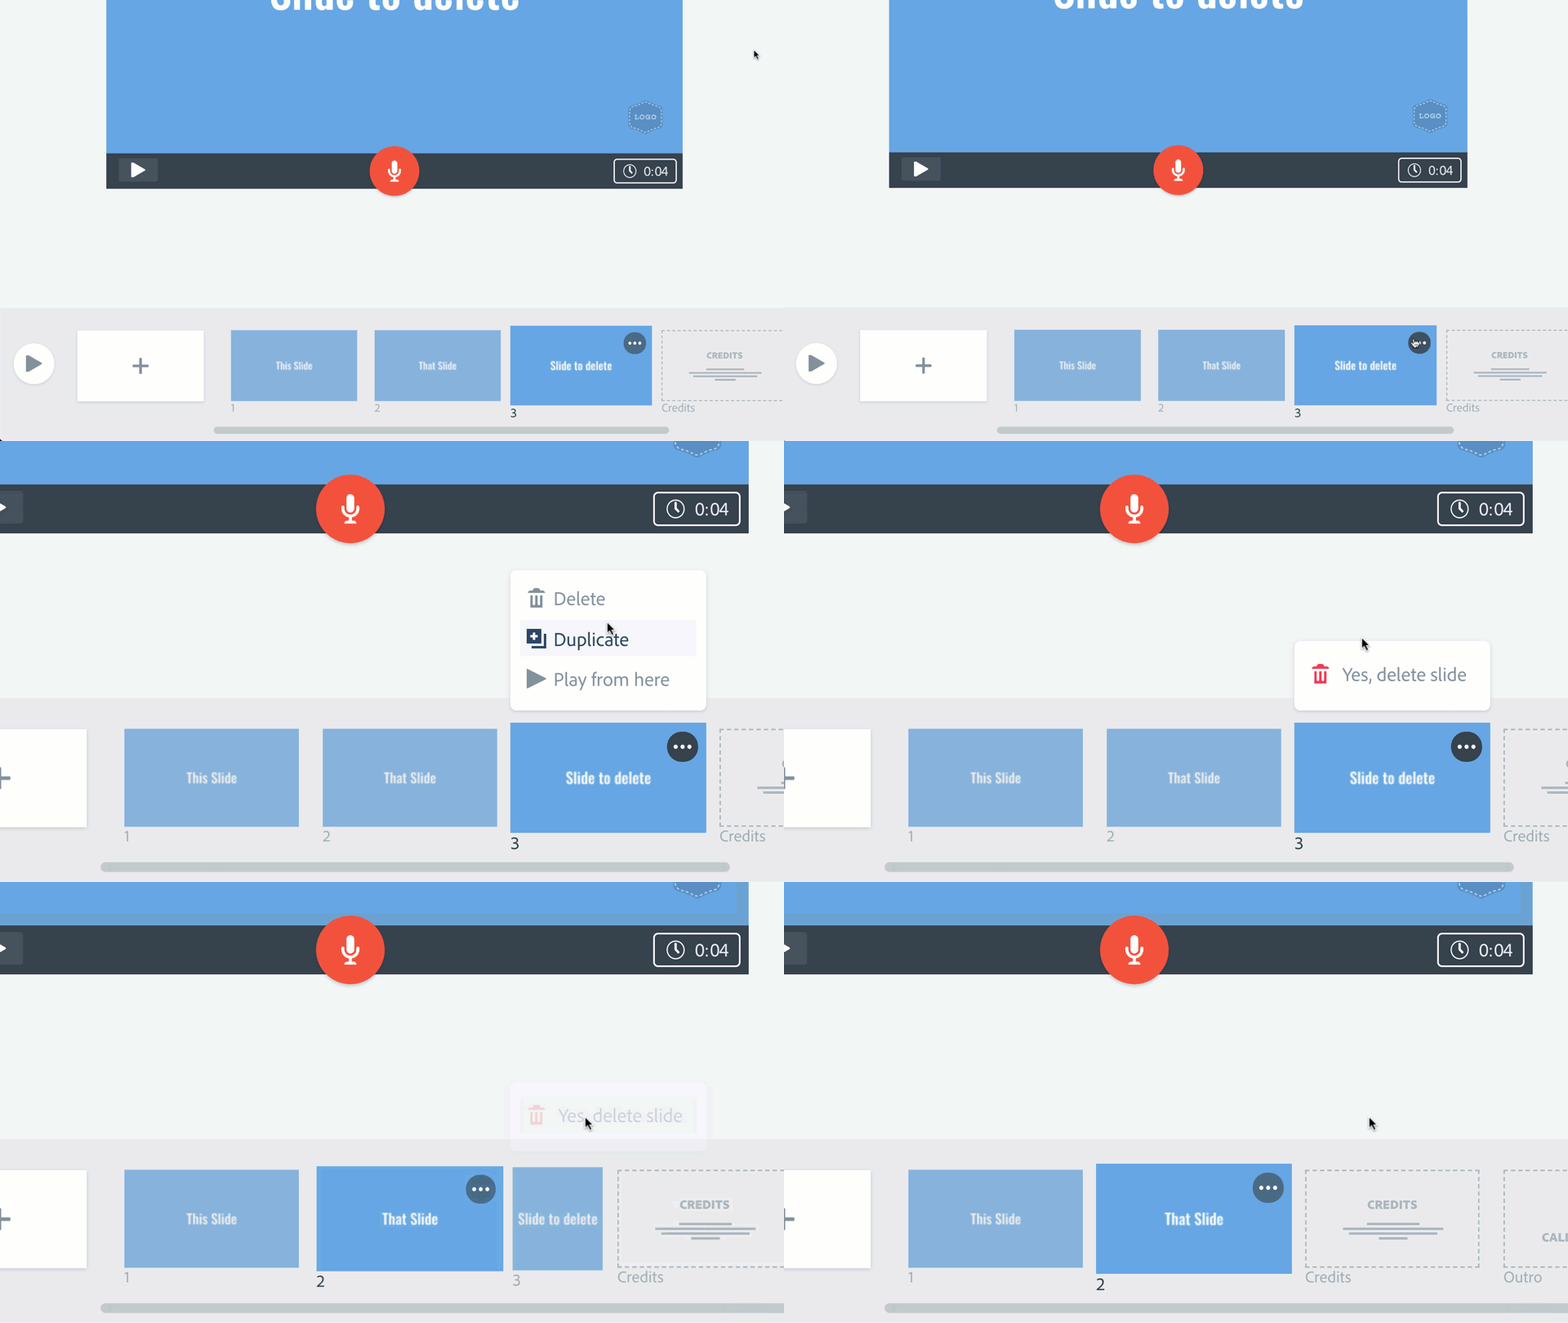
To delete a slide from your project, go down to the slide in the Video Timeline and click on the “…” button that appears on the top right hand corner of the slide and select “Delete” from the dropdown menu. You will be prompted one more time to click on a “Yes, delete slide” button. This is a safety mechanism since you will not be able to restore a slide to your project once it is deleted.
Credits and Outro Slides
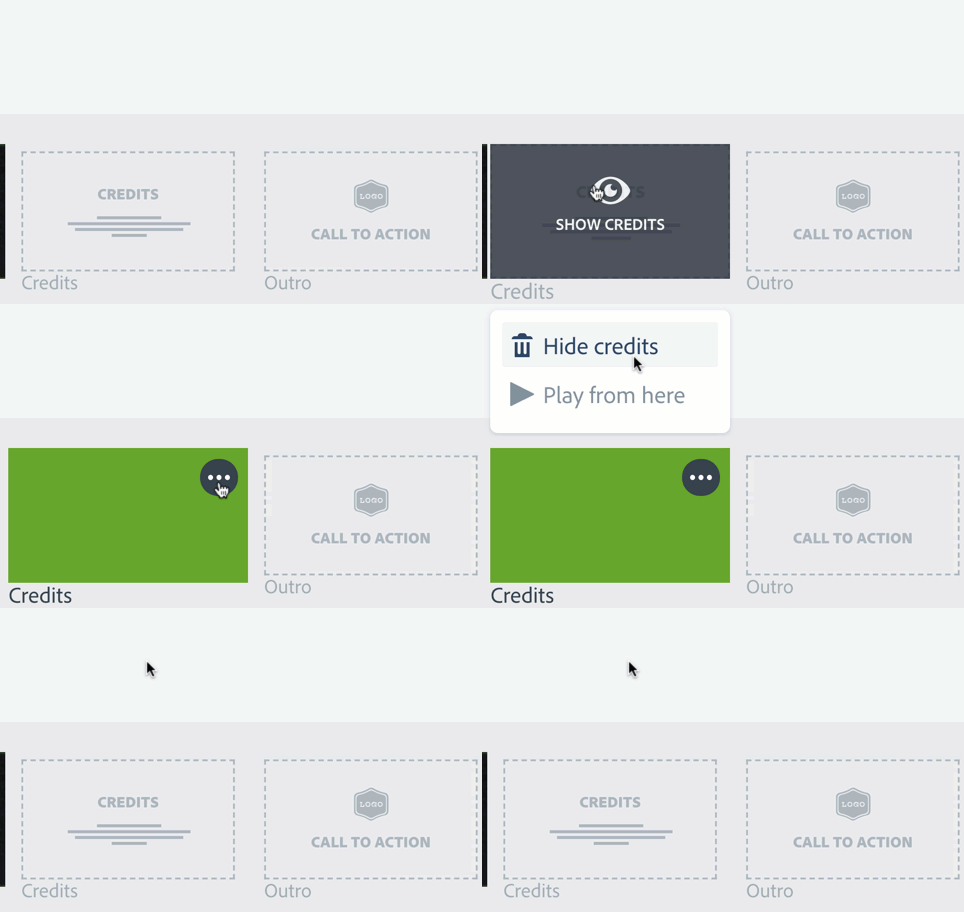
You can arrange arrange and delete slides however you wish, except for the Credits and Outro slide which will be included in every video project. These slides are hidden by default, but can be turned on and off at any time. To turn on a Credit or Outro slide, simply click on it to activate the slide in your project. To turn off a Credit or Outro slide, click on it in the timeline view and click on the “…” button that appears on the top right hand corner of the slide and choose the “turn off…” option from the dropdown menu that appears.
The Play Button
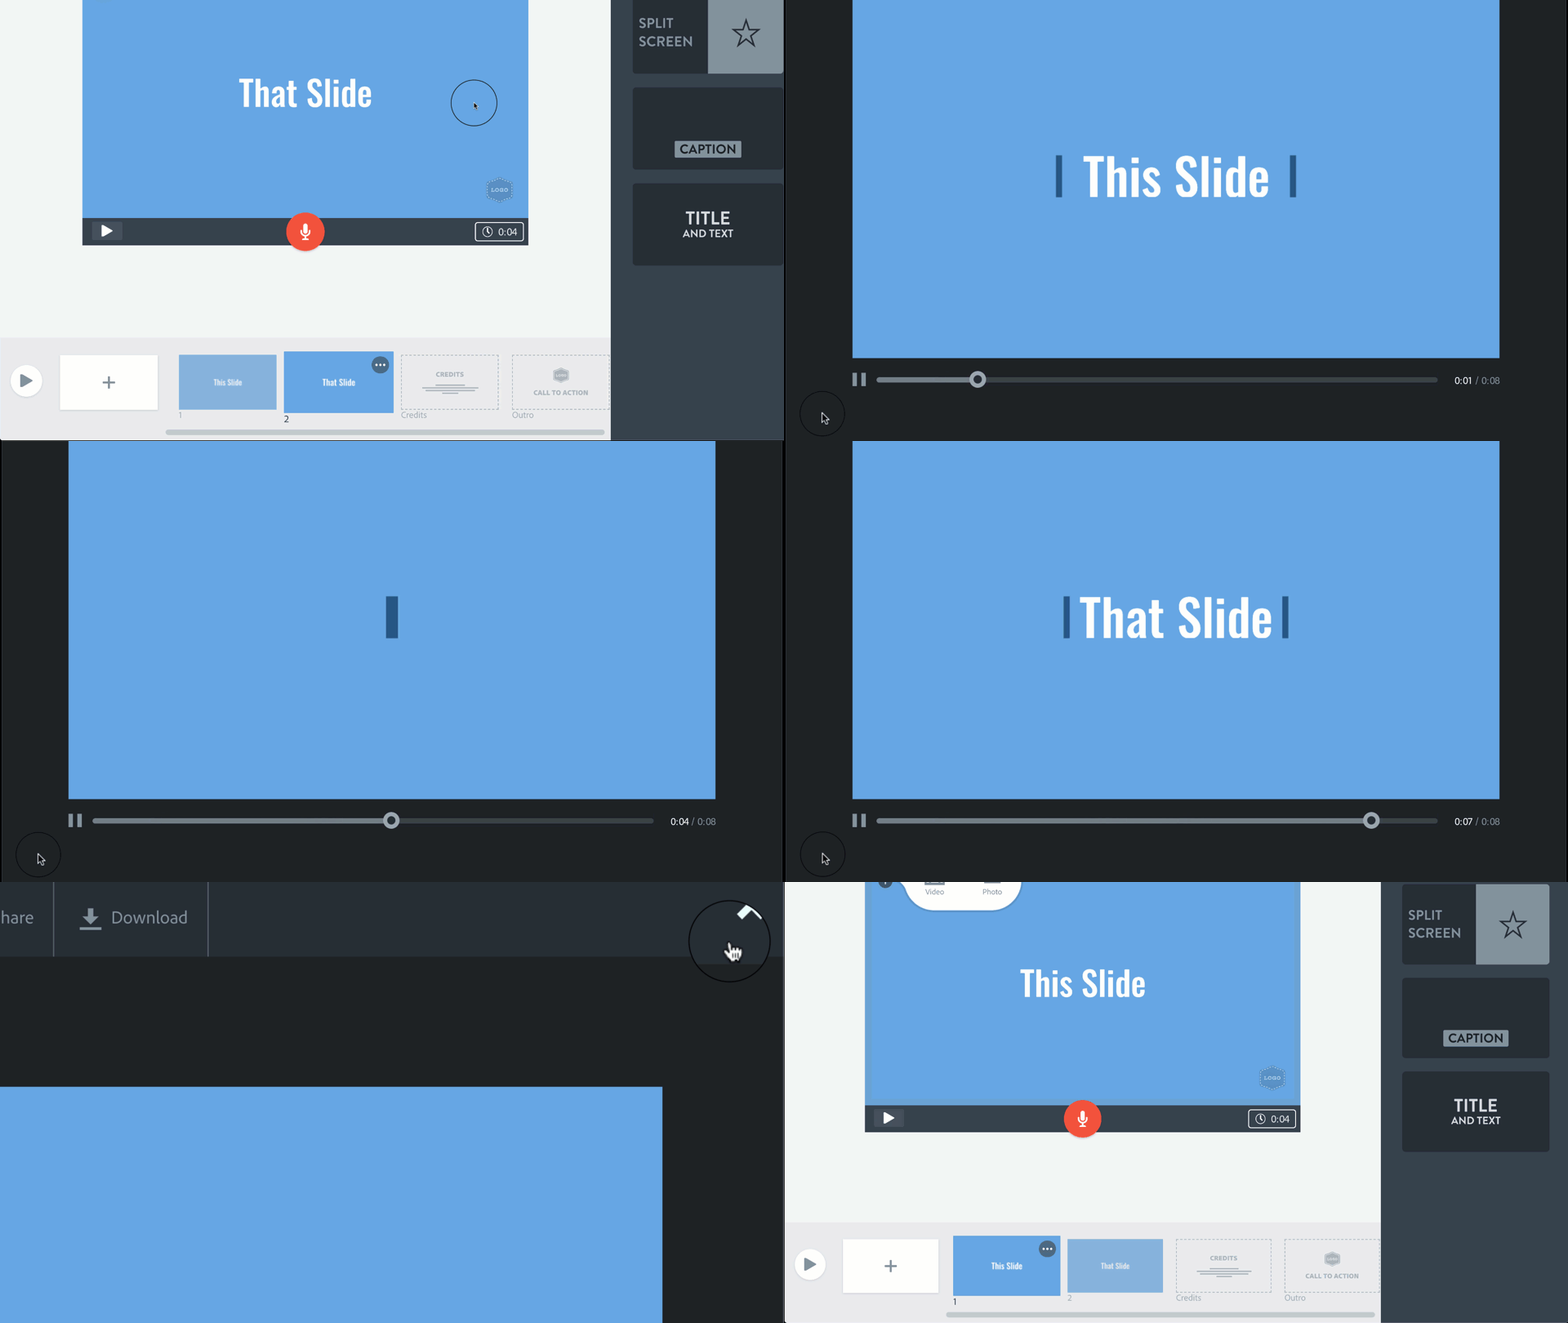
Clicking on the play button on the left hand side of the Video Timeline will bring up a pop-up preview of the full video you are assembling. You can go back to editing the video at anytime by going to the top right hand side of the preview pop-up and clicking on the “X” button.

The Style Tabs
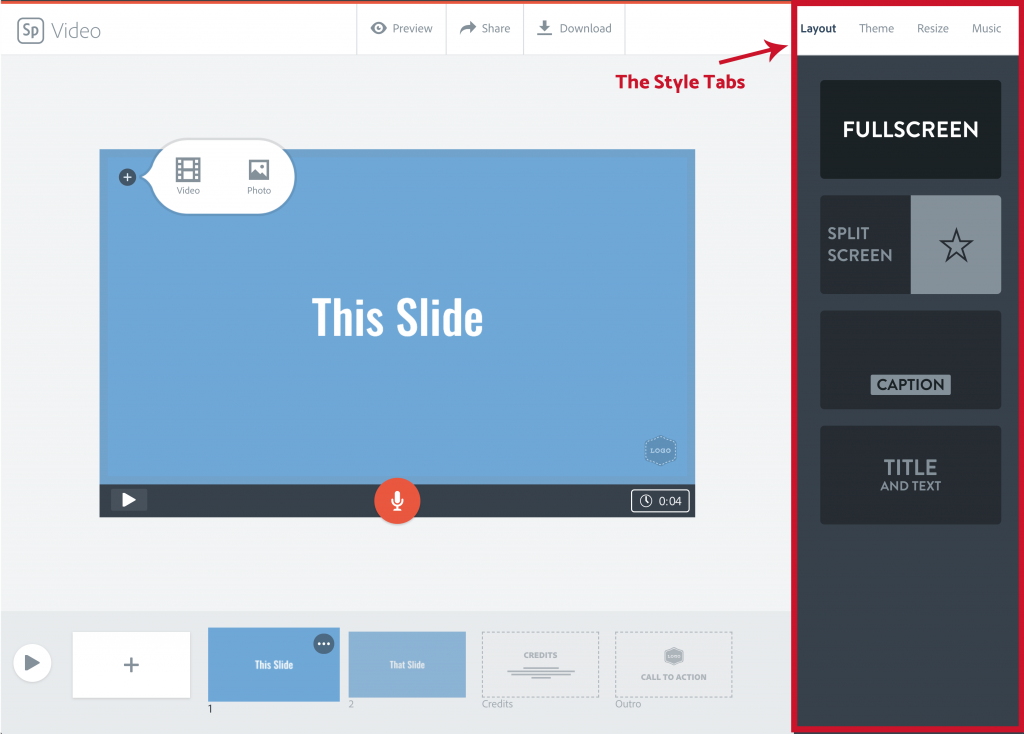
The Style Tabs on the right hand side of the Spark Video Editor allow you to change the look and feel of your project and slides, as well as selecting the option to play music during you video. The tabs are broken up into; the Layout Tab, the Theme Tab, the Resize Tab, and the Music Tab.
Layout Tab
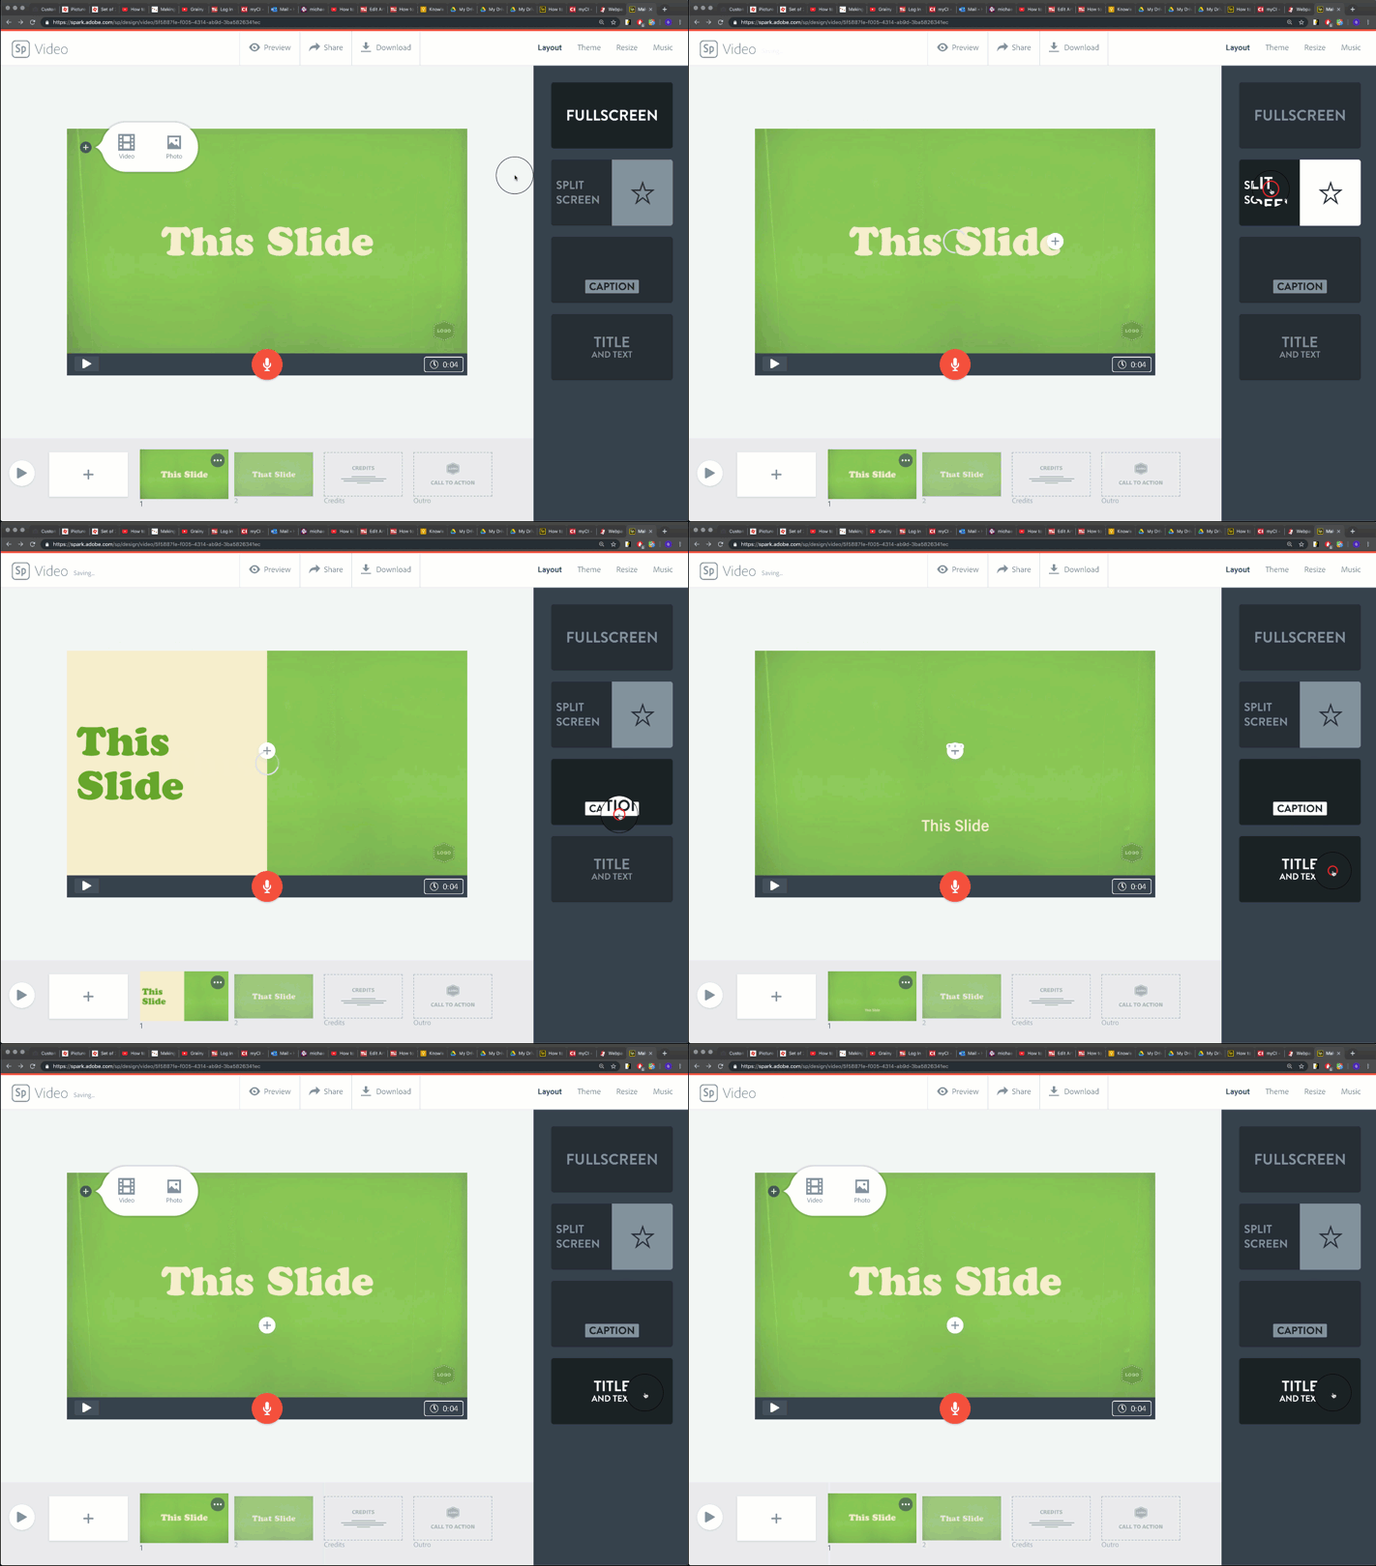
The Layout Tab is where you can choose how to format the visuals of individual slides based on pre-set templates.
Theme Tab
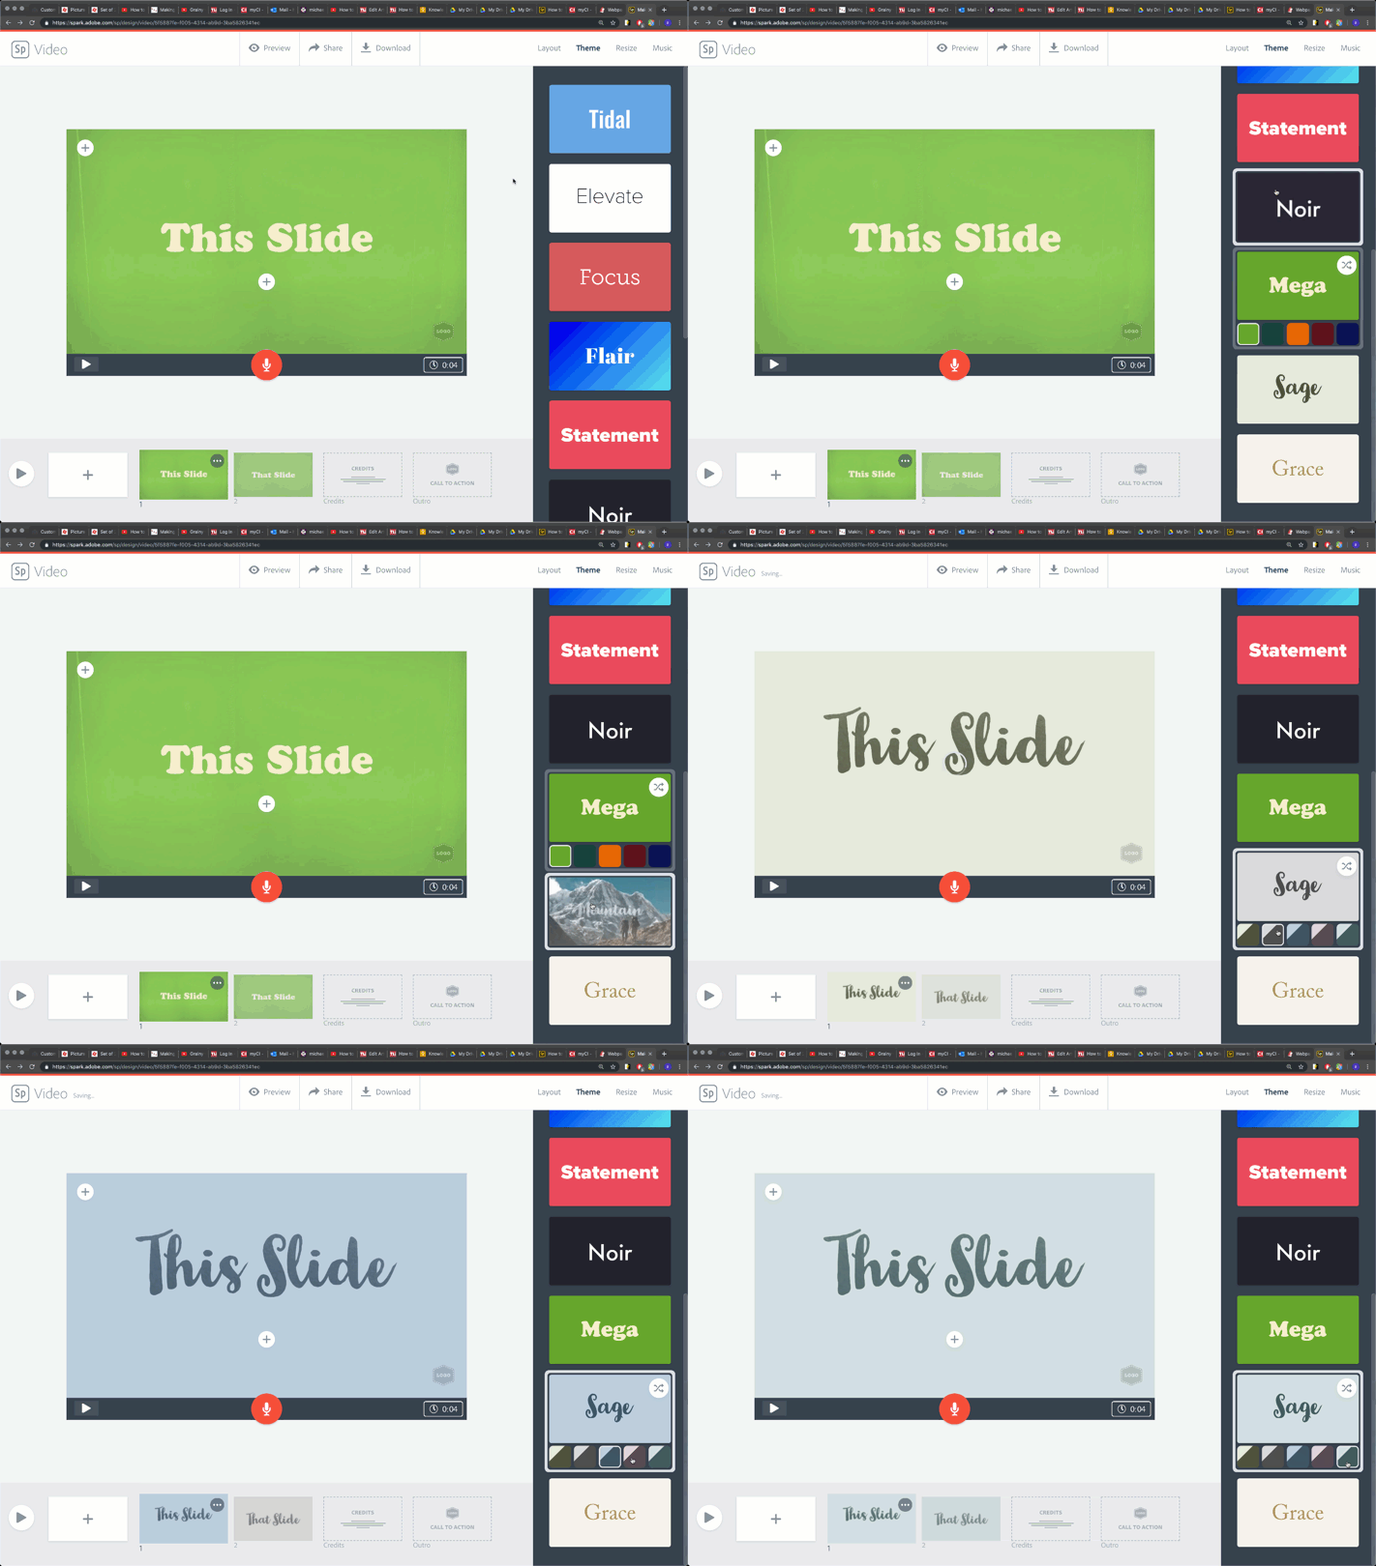
The Theme Tab is where you can edit the entire visual style of your video all at once. By choosing a theme, all of your slides will be set to the same visual and typographic style automatically, you can also select different pre-set color schemes for each theme to best suit your preference, but changes will reflect across every slide and slide type.
The Resize Tab
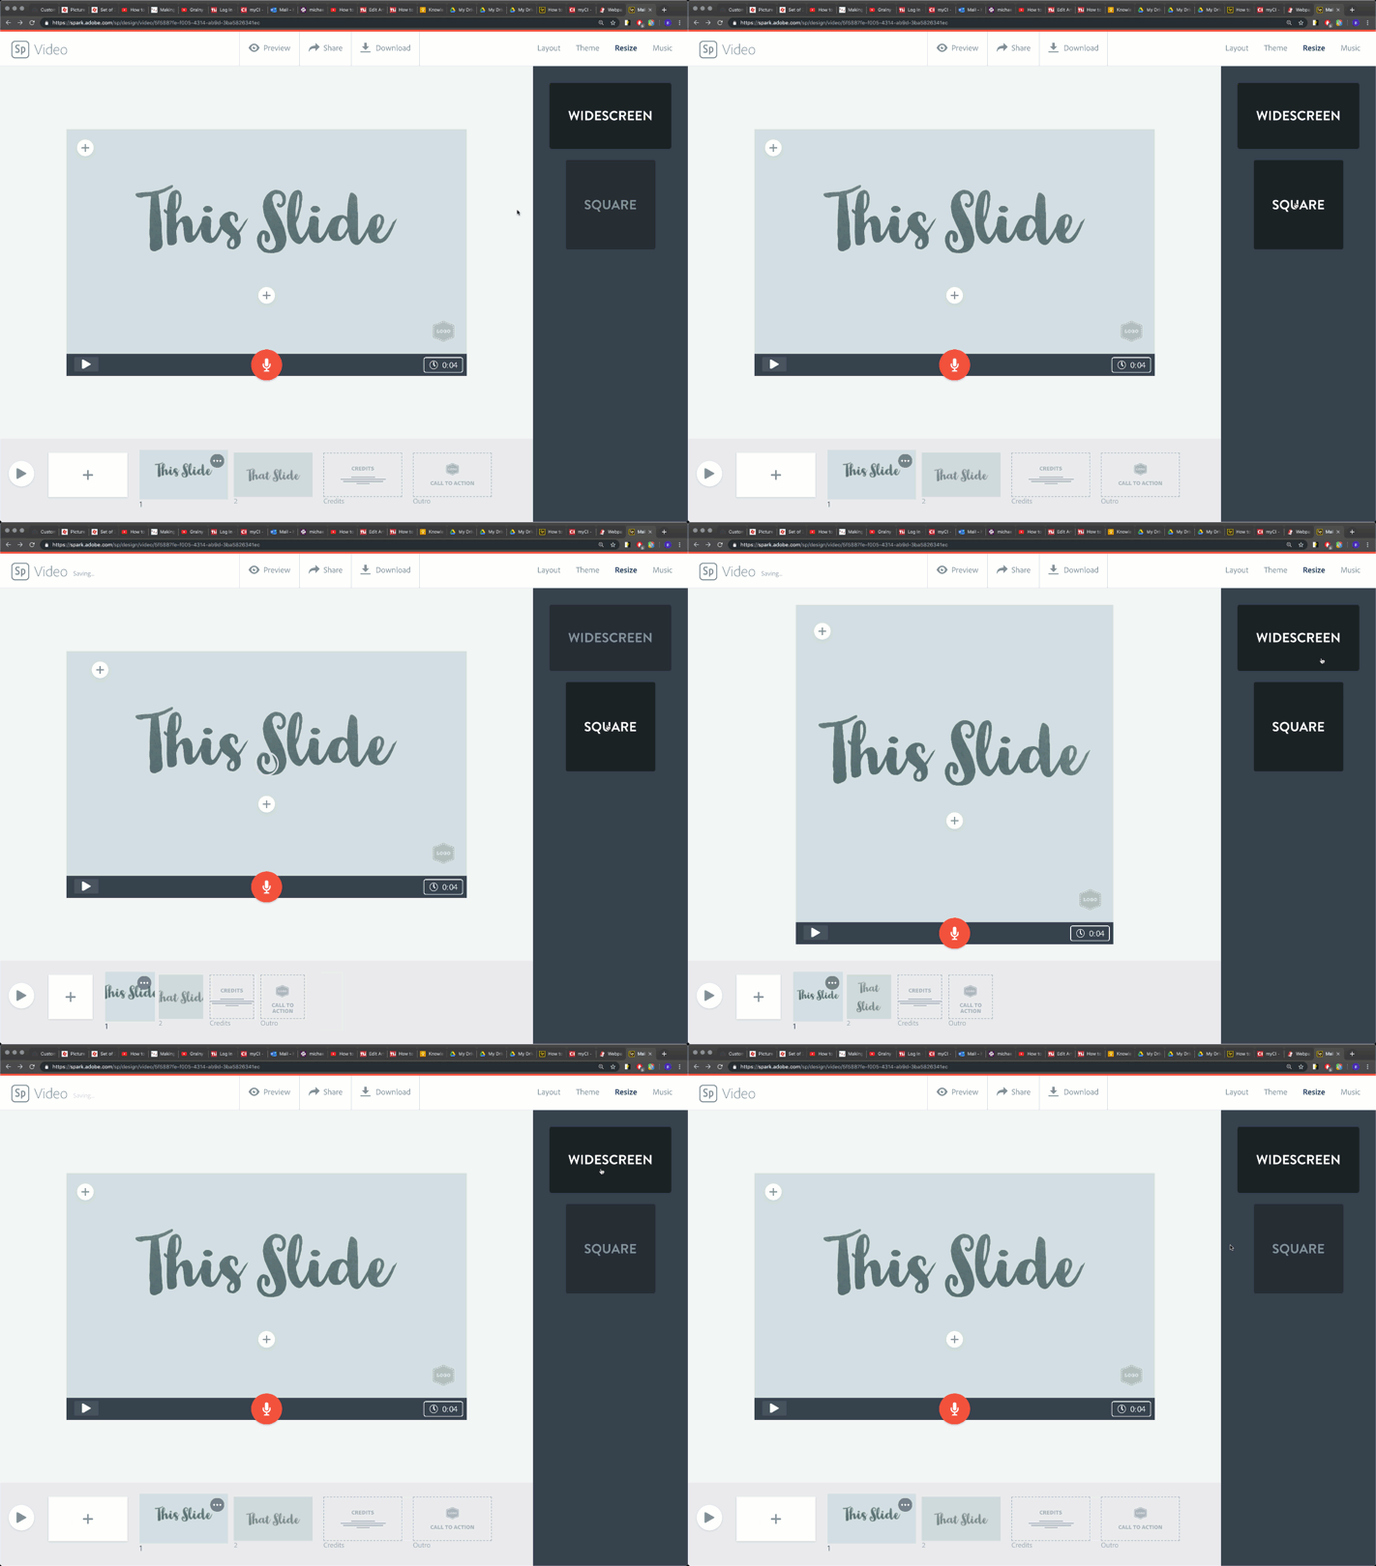
The Resize Tab allows you to choose the size your video will be displayed on people’s screens. There are two sizes to choose from: Widescreen and Square. Widescreen is a typical video sized format that will best display on computer screens and video sharing websites like YouTube while square sized formats are meant for videos to be shared on social media sites like Instagram.
The Music Tab
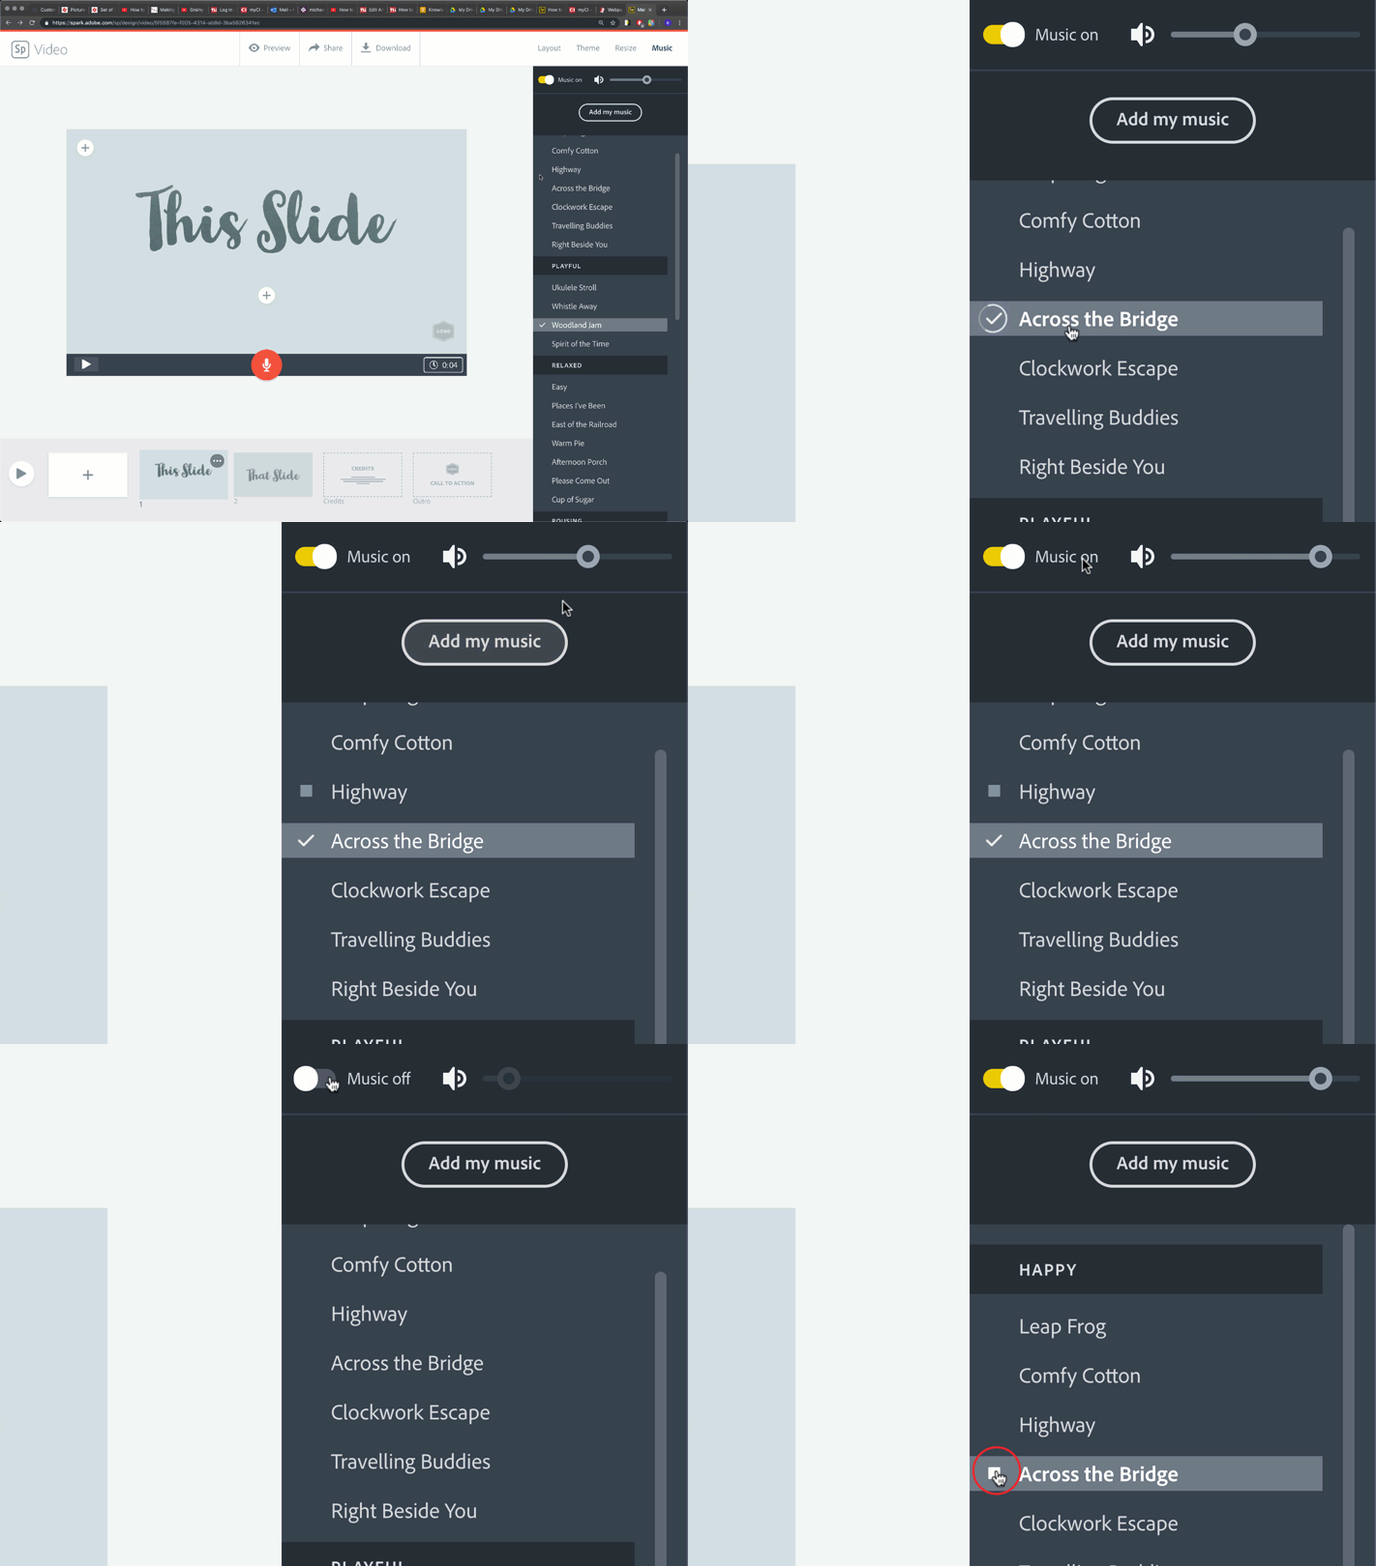
The music tab allows you to add music to your slide either from your computer or from the library of copy-write free music Spark Video provides. To choose music from the Spark Music library, simply click on the name of the song or choose the play button that appears next to the name of the song to preview it.
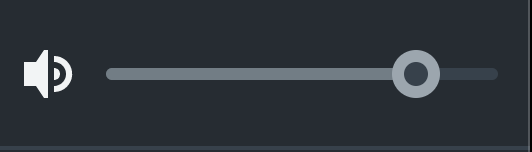
To adjust the volume of the music during the slide, use the volume slider at the top right hand side of the music tab when you have a song selected.
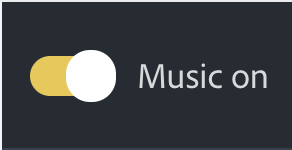
If you want to turn off music for the slide altogether, uses the Music On/Off switch at the top left hand side of the music tab
The Canvas and Editing Slide Content
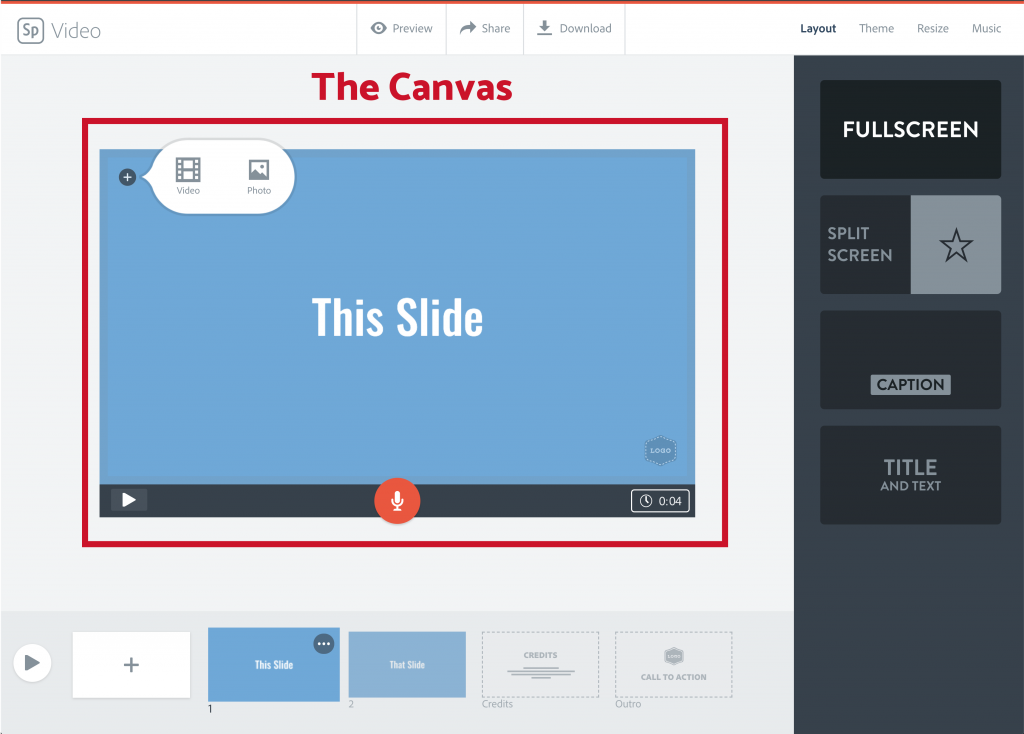
The Canvas is the large playback area in the middle of the Spark Video Editor where you can add, edit, and delete content on individual slides as well as playback the animations for the individual slide.
Adding and Editing Media on Slides With “+” Buttons
When you see a “+” button on your slide, you can click it to add different pieces of media on the slide based on your current slide layout. Different slide layouts will allow you to do different things with the “+” buttons like add a background to your slide, but by default, most “+” buttons will allow you to add video, text, photos, or icons. Individual slides will have limits on how much media can be added to keep you video as clean and organized as possible
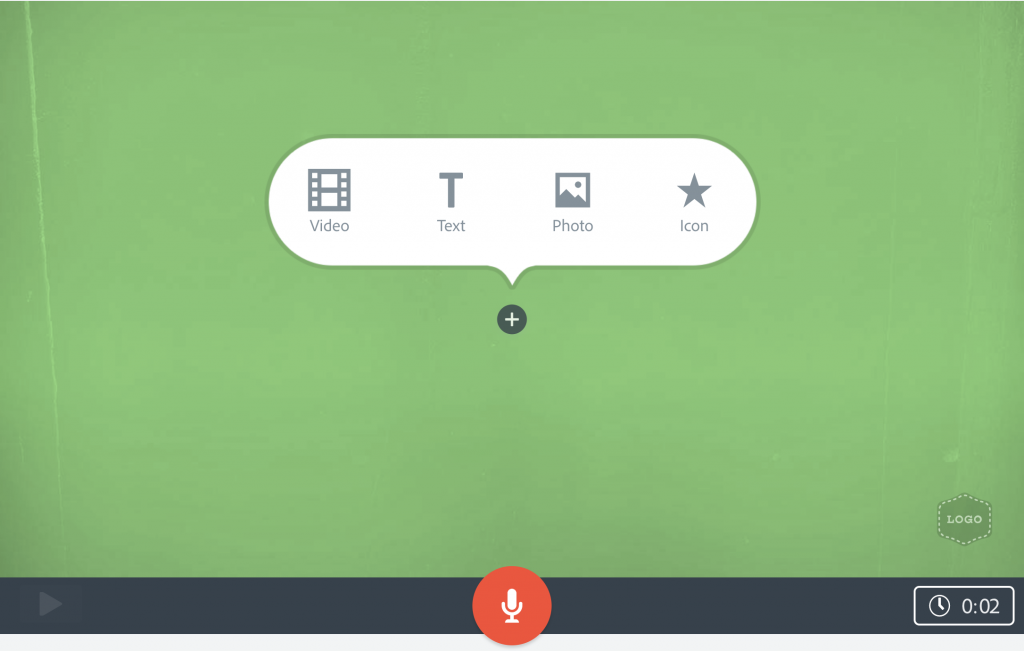
To edit or delete a piece of media on your slide, simply click on it in the Canvas to view the media’s options and the delete button.

Different Media You Can Add To A Spark Video
Text
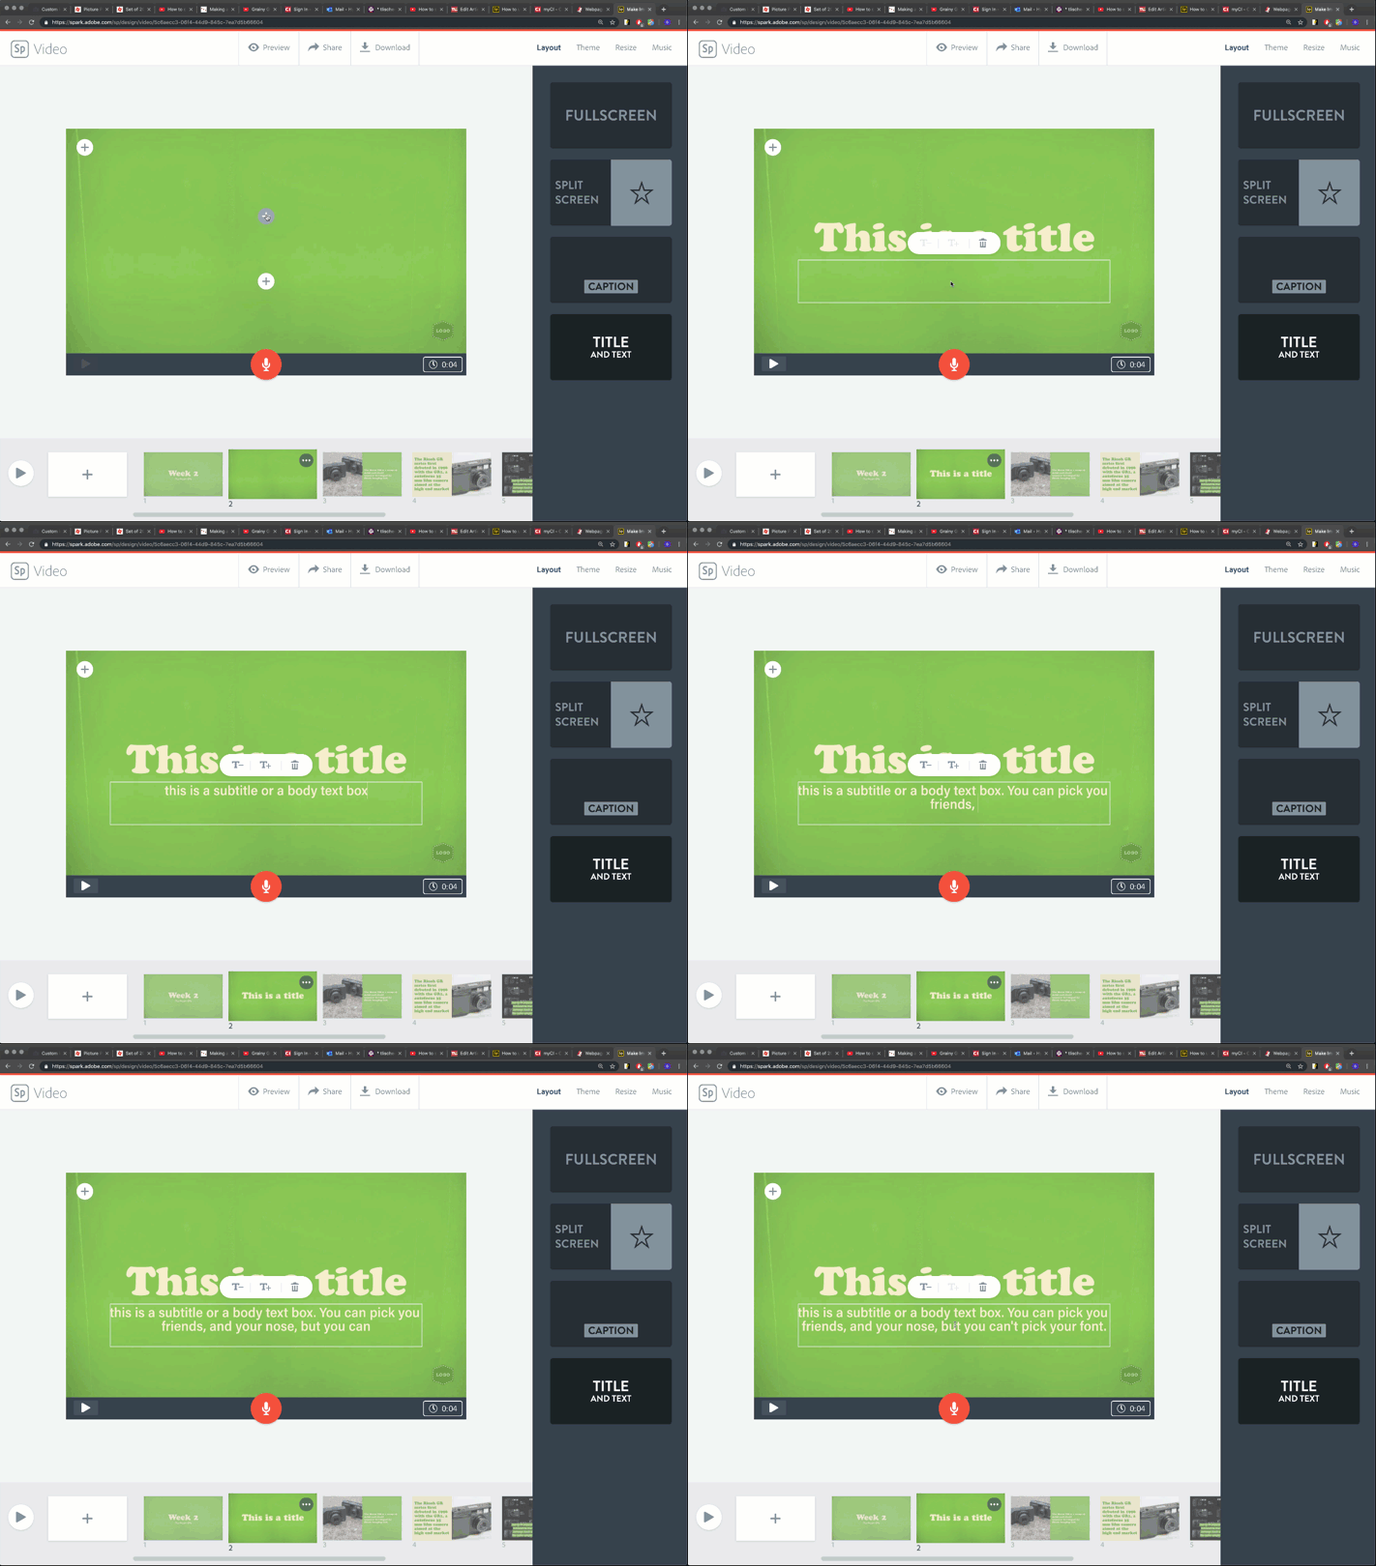
By clicking on the “Text” option on a “+” button, you can turn the immediate area that the “+” button controls into a text box. The difference between text in Spark Video versus something like a powerpoint is that you have significantly less control over the text. You cannot draw new text-boxes, change the size of the box, change the font (fonts are based off of theme choice), or format a box to a different style such as a Title versus a body text box. The only control you do get with text is to change the overall size of the text in the box.
Videos

By clicking on the “Video” option on a “+” button, you can directly upload a pre-made video from your computer into a Spark Video.
Icons

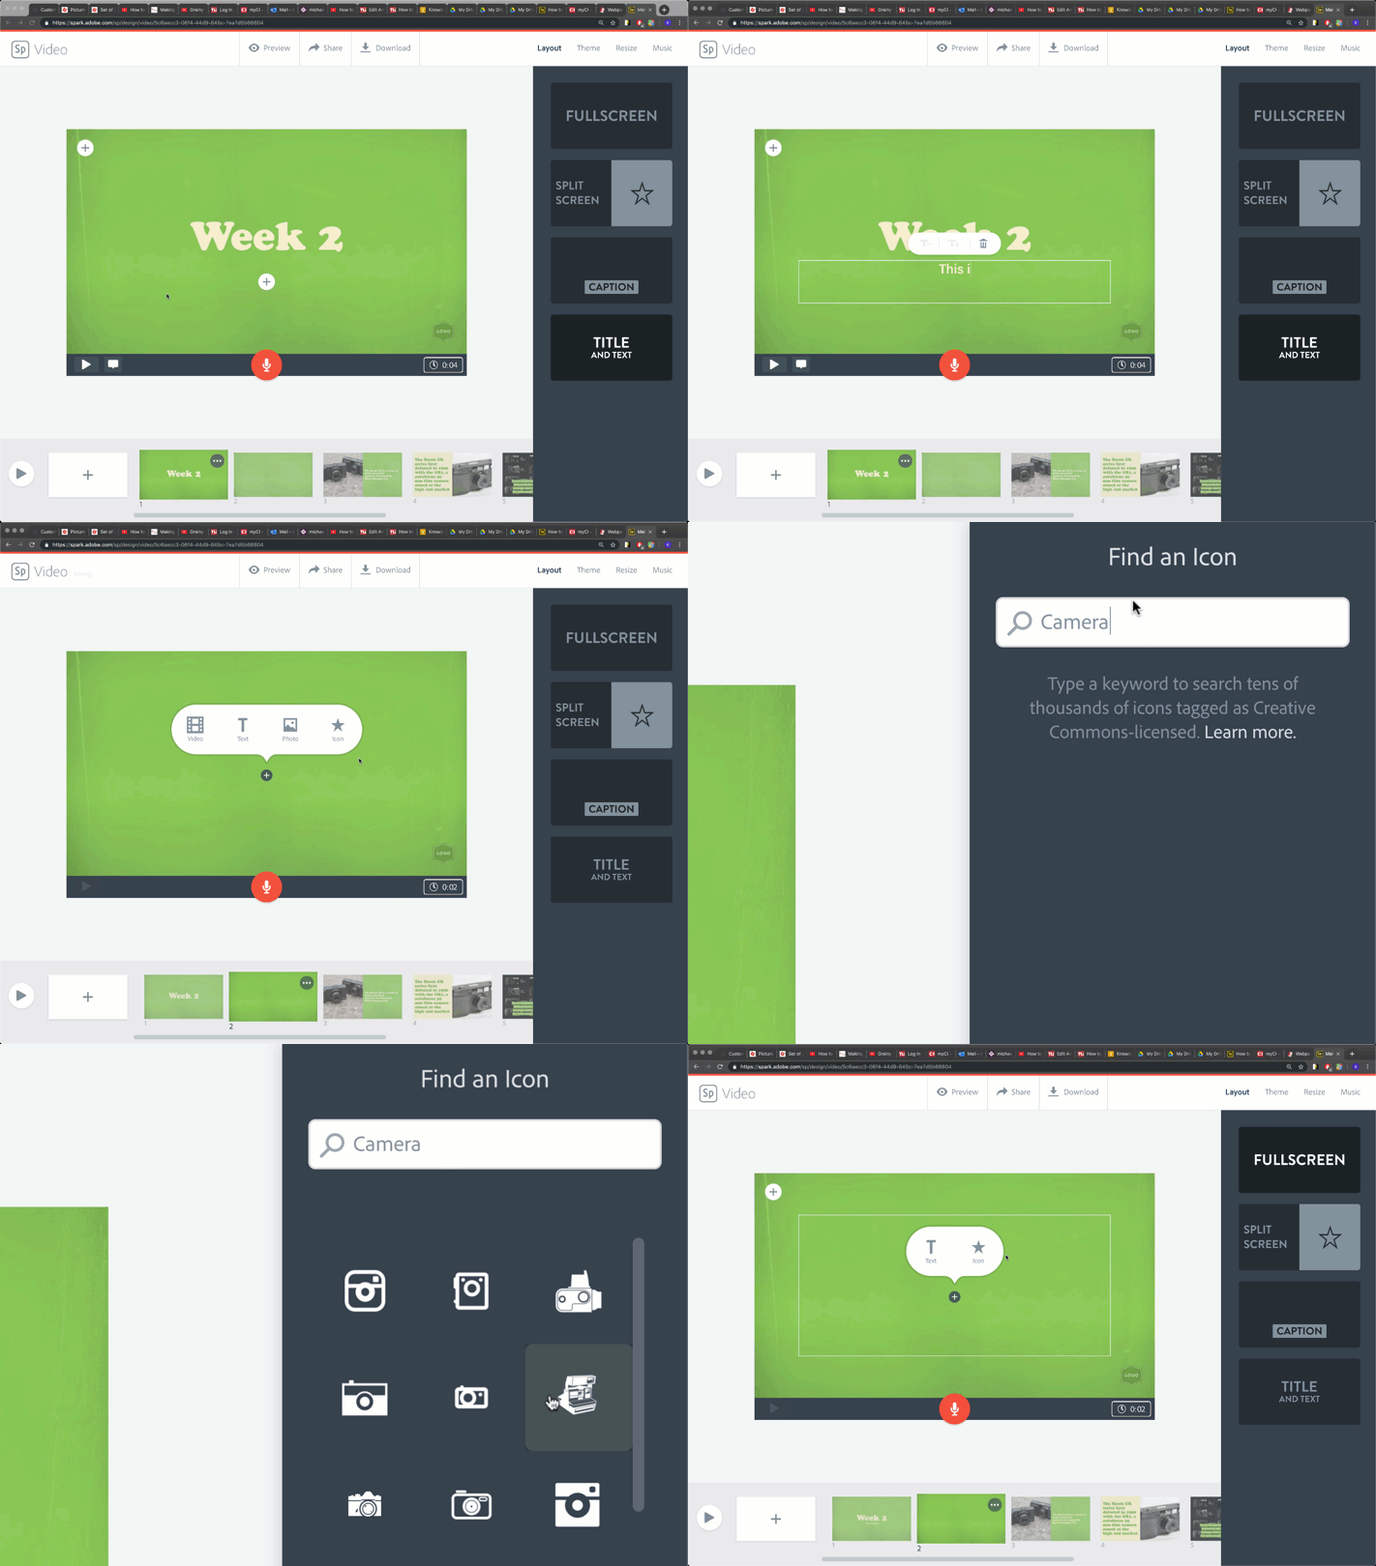
Icons are sets of pictures that Adobe Spark provides to add graphical elements to your video without having to worry about copyright infringement. To find an icon, choose “Icon” from the “+” button options and use the Icon tab that will appear on the right hand of the Canvas (where the Style Tabs are usually located) to find and select an icon.
Photos

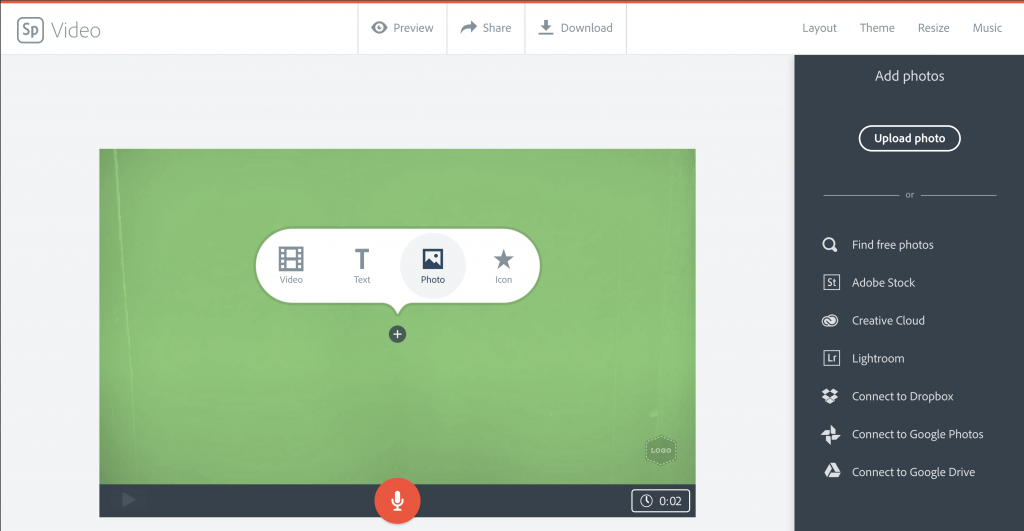
Adobe Spark Video gives you the option to add picture from a variety of different sources such as your Adobe library, Adobe apps, your computer, dropbox, and google accounts. You can also search for copyright free photos directly in Spark Video by clicking on the “Find free photos” button in the “Add photos” tab.
Slide Timing and the Playback Button
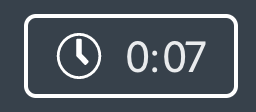
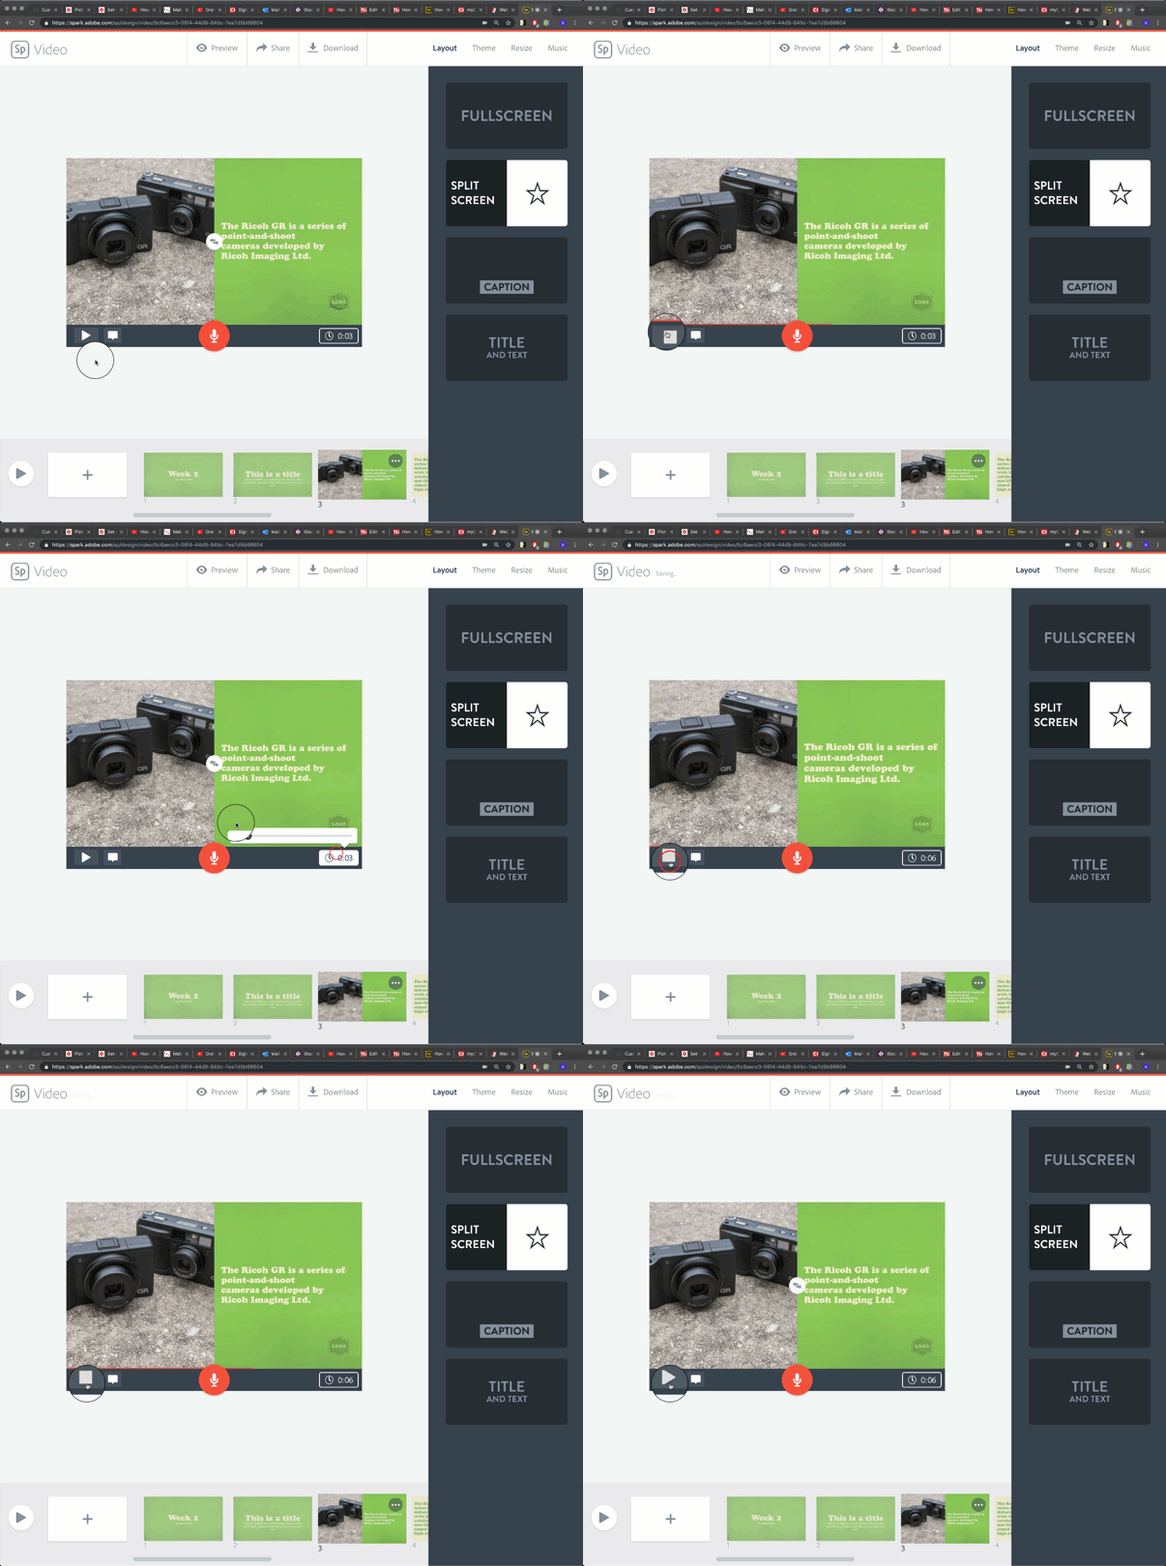
The timer on the bottom right hand side of the Canvas is for changing the timing of how long each individual slide will stay on screen during the final video you will export. To change the amount of time a slide will be displayed, click on the timer and use the slider from the dropdown menu it reveals to modify the timing of the slide. The pre-set animations and transitions of the slide will automatically adjust based on how much time you are giving each slide to be displayed.

The Playback Button on the bottom left hand side of the Canvas will allow you to view the timing changes that you have made to a individual clip, along with a preview of how quickly the slide will transition into the following slide. pressing the Playback Button will play the slide once in the Canvas. You can press the Playback button anytime during the playback to cancel the preview and return to editing in the Canvas.
Slide Narration
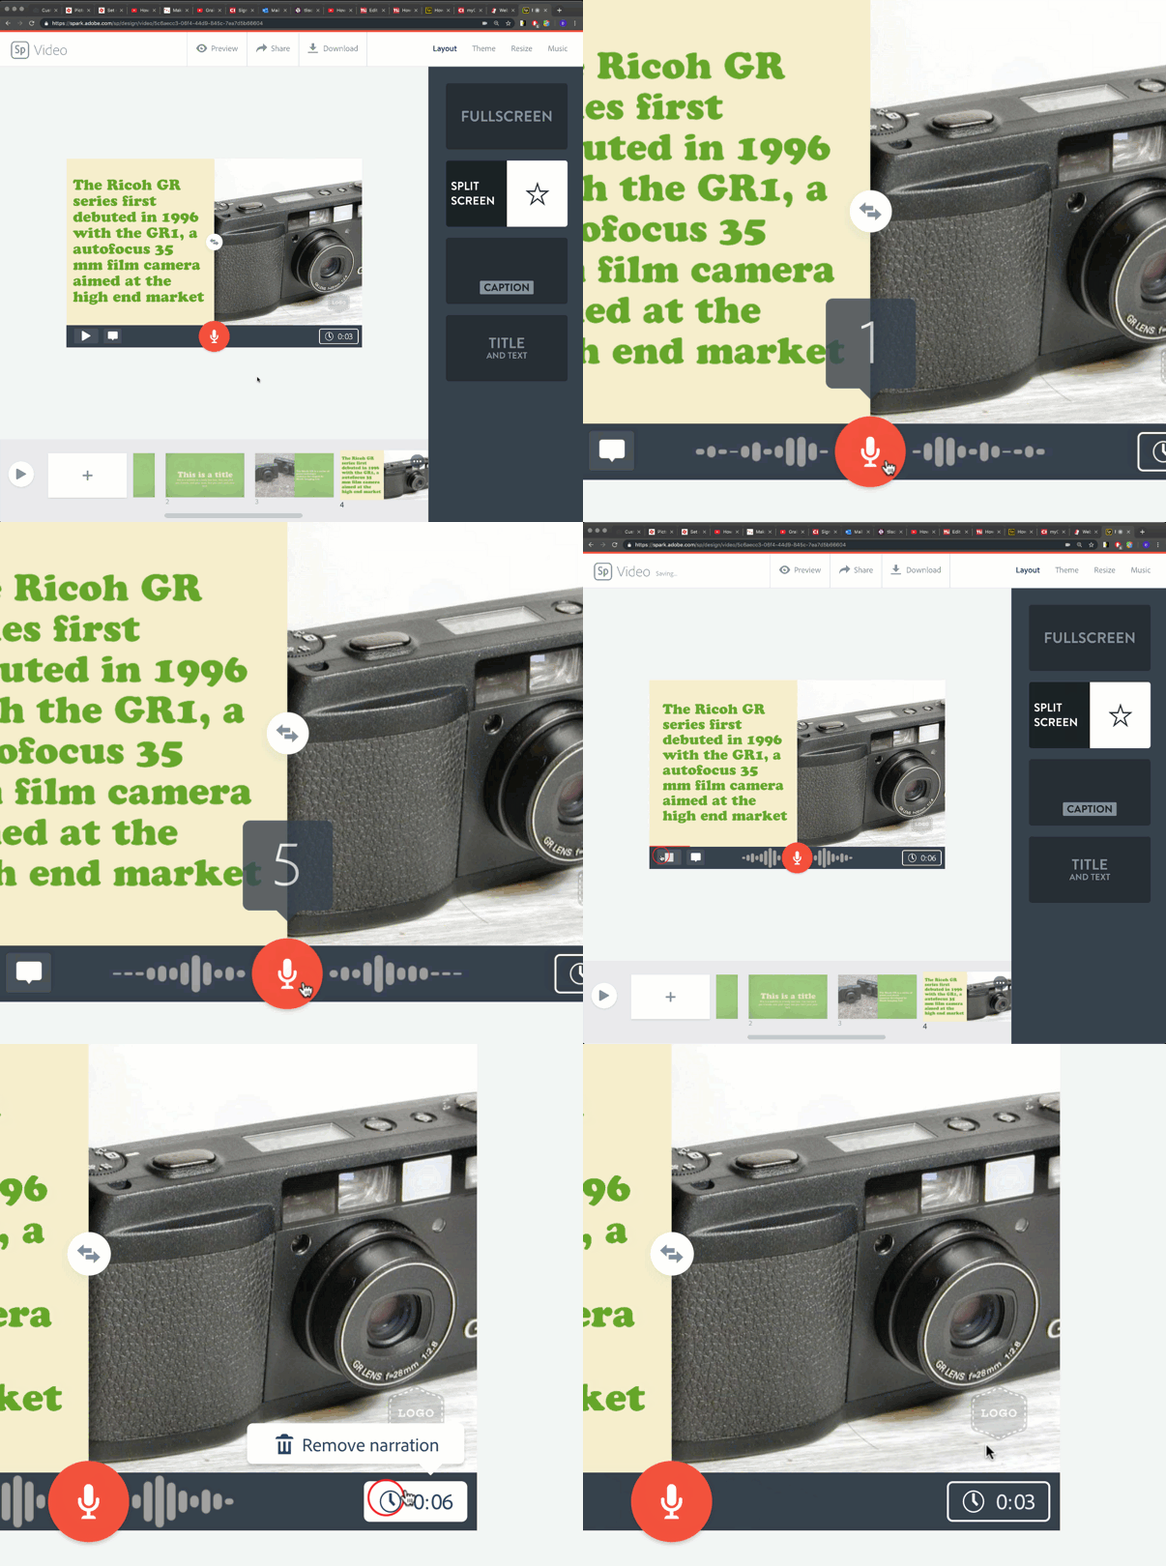
You can add your own voice narration to any slide by pressing and holding the Narration Button in the bottom middle of the Canvas. This will automatically start a recording using your computer’s built in microphone and stop the recording when you let go of the Narration Button, saving the narration to the slide. If the narration is longer than the original timing of the slide, it will automatically change the timing based on the length of the narration.
To delete a narration, click on the slide timer and choose “Remove narration” from the dropdown menu. This will also restore the previous timing for the slide.
A Note on Narration and Web Browsers
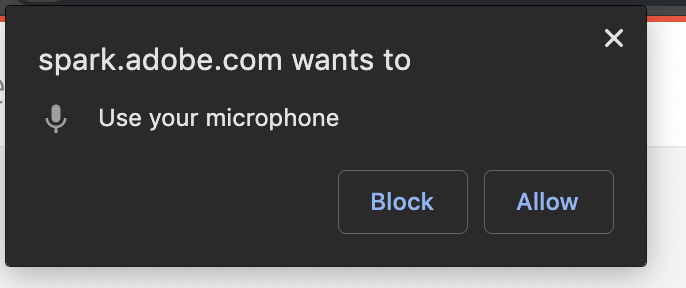
If you have not used the narration feature on Spark Video before, you may be prompted by your browser to allow Spark Video to use your microphone. Please allow this to use the narration feature.
Sharing and Downloading Your Completed Spark Video
Once you have finished assembling your video in the Spark Video Editor, it’s time to export it and share it with the rest of the world. At the top center of the Spark Video Editor, next to the alternative preview button, you will find your two choices when it comes to sharing videos created in Spark.
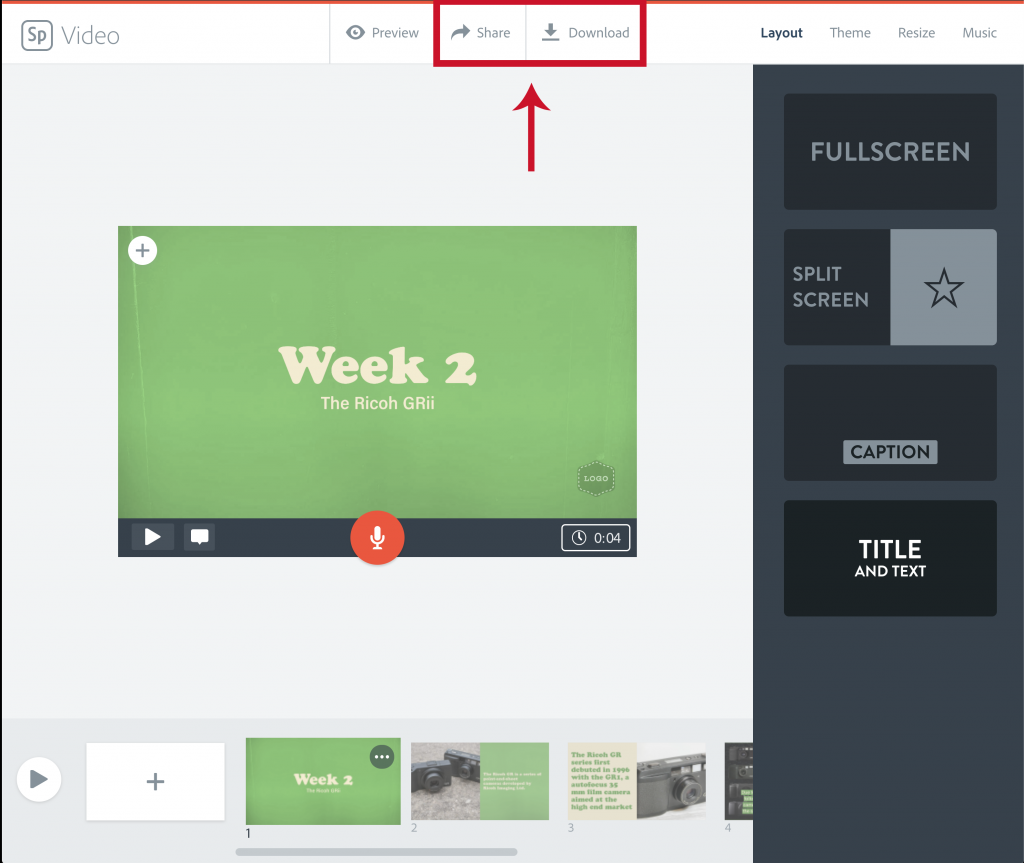
The Share Button

Clicking on the “Share” Button will generate a pop-up window with a link to the video you can share out to people who want to watch it. This video will be hosted on Adobe Spark and you will not need to host it on any other platform if you send out this link. This pop-up window will also provide publishing options if you want to directly embed this video inside a social media post, Google Classroom, E-Mail, or website without having to use another hosting service.

The Download Button

Clicking on the “Download” Button will automatically export your video into a .mp4 file onto your computer, .mp4 files are the most common form of video files and will allow you to upload your video to a multitude of different platforms such as YouTube, Vimeo, ShareStream, etc.
A Note on Downloading Your Video
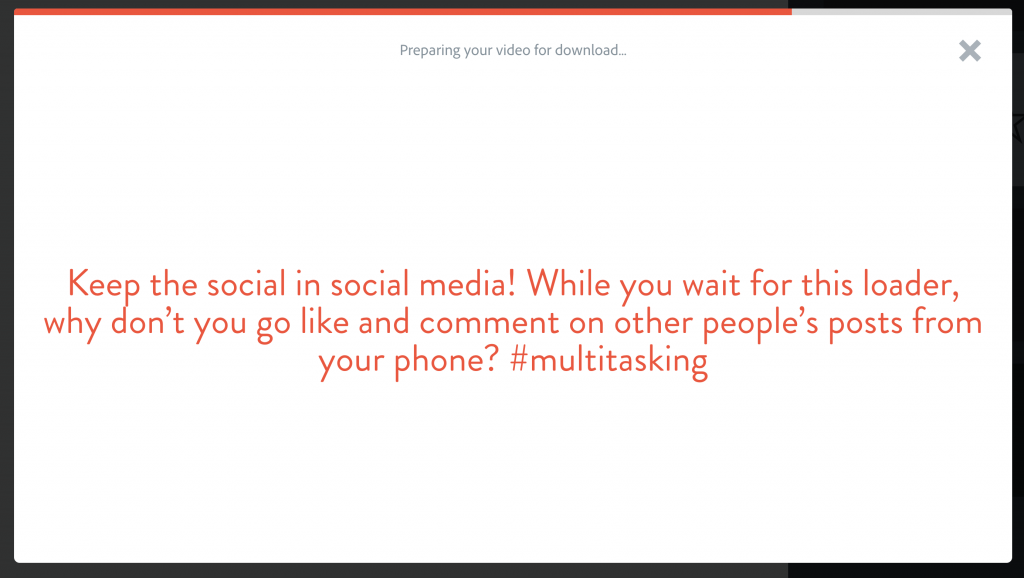
Creating a .mp4 out of your Spark Video project will take some time, a pop-up window with a small progress bar at the top will appear while your video renders. Keep this window and the Adobe Spark Editor open until the video begins to download onto your computer. Once the video is downloading onto your computer, you can close out of Spark Video, but keep the browser open until the download finishes.